
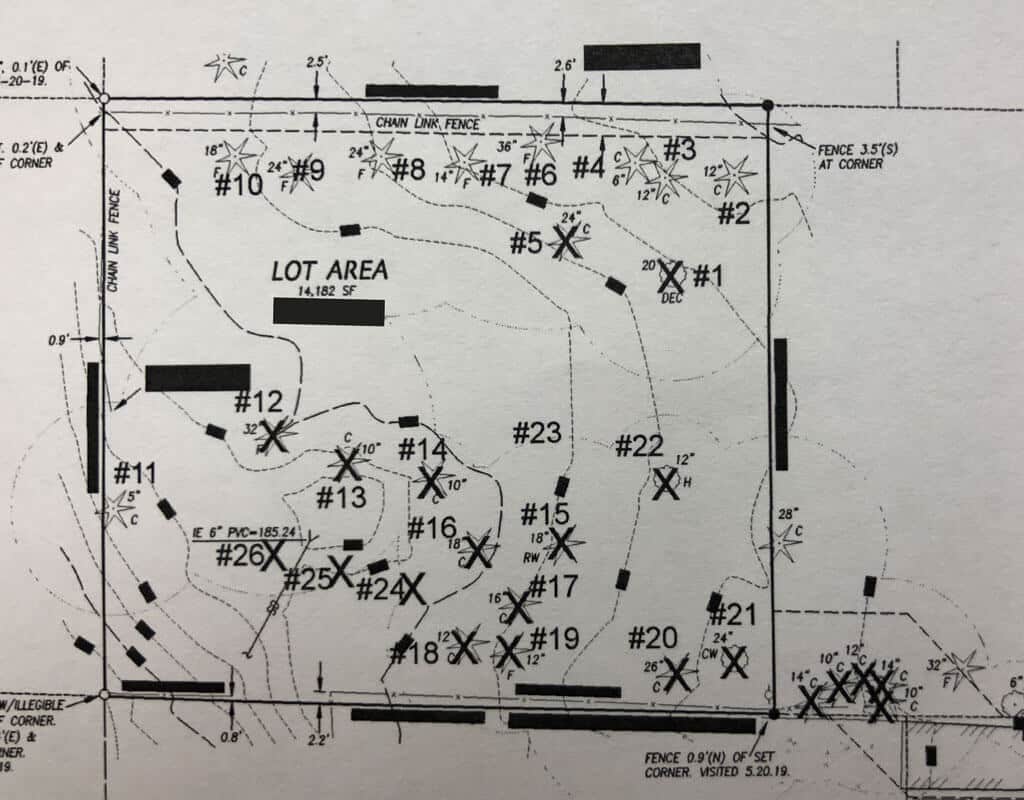
Here’s a snapshot of the initial tree removal map. Every X is a mark of doom. Sadly the number of trees slated for the chopping block has increased since I took this photo.
Back in August of 2019 I noticed a tree removal permit posted at the street in front of our house. I assumed it to be a permit for a neighbor’s tree, but upon closer inspection my heart sank a bit – the permit was for 22 trees! I knew this meant the currently verdant, park-like vacant lot behind us was slated to be cleared and developed. We’ve always known this was a possibility, so we weren’t totally surprised, but that doesn’t stop the disappointment that it’s actually happening. We’re essentially losing a green belt and beautiful territorial view. Looking on the bright side, we enjoyed that view for over a decade (turning that frown upside down!)
Anyhow, if a builder is replacing those trees with a giant house, our back deck is going to have a stellar view of it. We’re just uphill from that lot, and our row of privacy arborvitae – which are about 15 feet tall – aren’t quite tall enough to break the sight line. Not really what we want. Pretty much the only way we saw to fix this (aside from jumping in our time machine and buying the lot when we had the chance) was to plant something taller. So that’s what we did!
We started this process last summer and had the tree planted in late October. I had the full intention of writing about this when it happened, but then I hibernated for winter. And now it’s spring, which is also a good time for planting trees, so I thought late is better than never. Hopefully this blog post will be helpful to anyone thinking about planting a big tree this year. And honestly it might help us too – the vacant lot plan has changed at least once and we might plant more trees, so this will be a handy reference when the time comes!
1. Define Your Primary Goal(s)
What is the most important result? Year-round privacy? A specimen tree? A tree that fills complements and fills out the rest of the landscape? There are a lot of factors to consider in this process, and in the thick of decision-making (not seeing the forest for the tree? Sorry.), I had to remind myself of my primary goal (privacy) a few times!
2. Determine Location and Available Space
We knew pretty much where we wanted the tree – between us and the vacant lot. Once you have a general idea of the location, additional variables are:
- How much space is available?
Check this against the mature width and height of the tree. Be careful, some references use the 10 year size for mature height and width, but some trees eventually get much bigger. - How many trees?
You can get one tree, like we did, but you could also plant a grove! Some trees like Thuja plicata (Western Red Cedar) can be planted close together to create either a natural or manicured screen. - Tree size vs. growth rate vs. cost
Smaller trees are less expensive – is small ok, especially if the species has a slow growth rate? Big trees are pricier but potentially worth it if you need immediate screening. But some small trees grow really fast, so maybe small is okay! (I had a tough time with this one, can you tell?)
Lastly, I have to mention Hardiness Zone. Local nurseries will probably only have trees suited for your zone, but it’s important to note your zone when doing research. A Western Hemlock would be a sad sack in South Florida.
3. Think About Color and Form
What else is in your garden? We have a beautiful blue Atlas Cedar that would pair nicely with a red-leafed tree (a bit of foreshadowing for our own tree choice). How about textures? If you have a lot of finely textured trees, a broad-leaved evergreen like a Magnolia might provide the perfect contrast. Is every one of your trees different? Think about planting more of the tree types you already have to create visual repetition and harmony in the landscape. I have a couple books on landscape design which helped me think through this part.
4. Assess Available Light
To sleuth out the imminent light changes, I went down to city hall and looked at the proposed vacant lot site plan. The drawings revealed a death-knell for most of the trees, which means we’ll have a lot more southern and western exposure. Much of our back yard will shift from full shade to part shade/part sun. Some things to think about when determining light exposure:
- Sun by day – Which direction is the sunlight coming from and how does it vary throughout the day?
- Sun by season – How high is the sun in winter vs. summer? Are different trees/structures blocking sun at different times of year?
- Sun over time – How will the sun exposure change over time? Do you have trees that will grow to block sun in 3 to 5 years time?
5. Determine Soil Conditions
Is the location dry, evenly moist, or wet? Does it drain well? Wet soil is a factor for us, and we ultimately chose a tree with some ability to tolerate wet feet.
To test your soil, dig a hole at the planting site, fill it with water and record the rate of drainage in inches per hour. Quick draining soil (less than 1″/hour) is good for most trees. If the soil drains around 1 inch per hour, you’ll want to look at trees adapted to wetter soils. Drainage rates slower than 1″ per hour means the area is not good for most trees. Getting the right tree for your soil conditions is critical for growing a healthy tree.* There are plenty of options available.
* We actually had a couple of beautiful Incense Cedars drown when water from an uphill water main began to leak and soaked that section of the lot more than usual over the course of several months.
6. Think About Maintenance
How much maintenance are you willing to do? Some trees scatter leaves, seeds and fruit. Some need dormant spray to ward off pests. Others need ongoing attention like pruning or supplemental water. Be honest with how much upkeep you can realistically tolerate. I don’t have the time (or more honestly, the inclination) to mess with high-maintenance options. It’s a darwinian environment over here and that’s not likely to change soon – maybe when we retire or win the lottery (in which case we would retire, win-win!).
7. Assess Utilities and Access Points
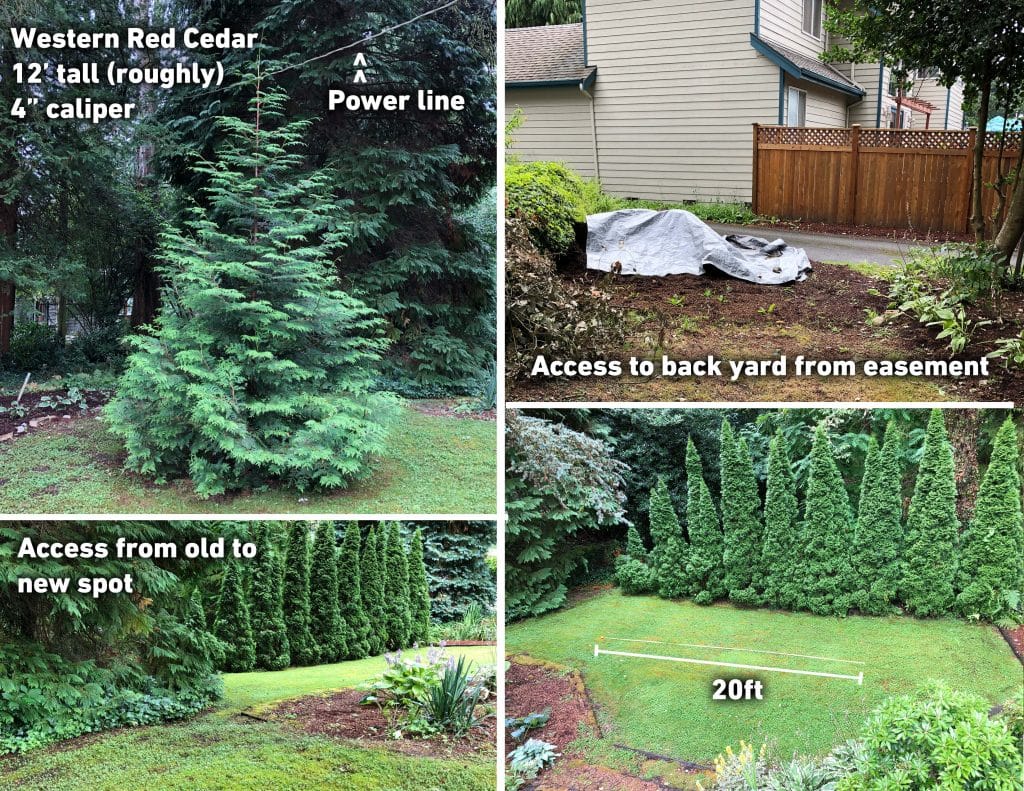
This is a quick photocollage of our access and utilities that I made to send the nurseries. I spent an unnecessary amount of time trying to make it look pretty.
Is there access to the spot you want to put the tree? You’ll want to confirm your findings with the supplier after step 8, but it’s good to at least have an idea of what’s possible. We are lucky to have no back fence (I guess?) and a shared easement which gives contractors access to our backyard. We were also blessed with a fairly clear path to the planting spot. Our electrical service hangs somewhat low diagonally across the back yard but this turned out to be a non-issue. This is all good information to supply the nursery.
Some things to think about:
- Width of path needed – What size of equipment will they be using? What width of path do they need? Our supplier used a small dozer-type vehicle that needed a 6ft width path, but there are probably some suppliers that can use a crane – a good question to ask if you are path-poor!
- Overhead utilities – Are there electrical, telephone or cable lines across the path?
- Underground utilities – Do you have buried water, sewer or electrical under the path? If so, the installers should place plywood so the soil isn’t compacted over those spots. The nursery should call 811 before they dig – utility workers will mark your property with flags or spray paint before planting day. If you don’t see this, ask about it!
Optional Step – Research Some Trees!
Your options will be limited to what is available at the local nurseries, but I feel like it’s a good idea to have an idea of what you want. Some info can be found at the nurseries’ websites, but there’s a plethora of info available elsewhere. Here are some resources I used:
Lake Forest Park Tree List – meant as a guide for homeowners who are replacing trees per the city tree ordinance. Also just a generally useful reference!
8. Find Some Big Tree Experts
Typical retail nurseries in our area don’t sell and install really big trees, so I had to find ones that did. I looked into 3, visiting one since it was close by, and contacting 2 others online.
We ended up going with Nursery Trees in Snohomish, more due to their customer service than price (all options seemed comparable anyway). They had a pretty extensive online form which I filled out, providing details about what trees I was considering and information our property info. I also provided photos marked up with measurements.
After some Q & A they provided 3 options at different price points. Two options were for small groves of Thuja occidentalis (Eastern red cedar) and the third was for a large red maple, which I honestly hadn’t considered at all (I leaned heavily toward evergreens in the beginning). The project manager invited me out to the farm where I took lots of photos to bring back and mull over with the first officer (ie husband).
A note about cost: the bids we received ranged from $1,000 for one big tree to over $3,000 for a group of trees. Planting more trees was more expensive due to both the cost of the trees and increased labor, with labor equalling about half the cost of the trees. I imagine this would vary a bit depending on your region.
9. Pick A Tree (or Several)
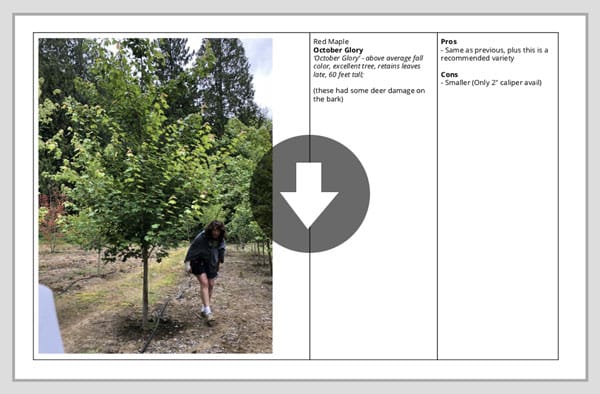
Here’s a PDF of the comparison table I made with all of our tree options. It’s real ugly but has lots of good info if you are in the market for similar types of trees.
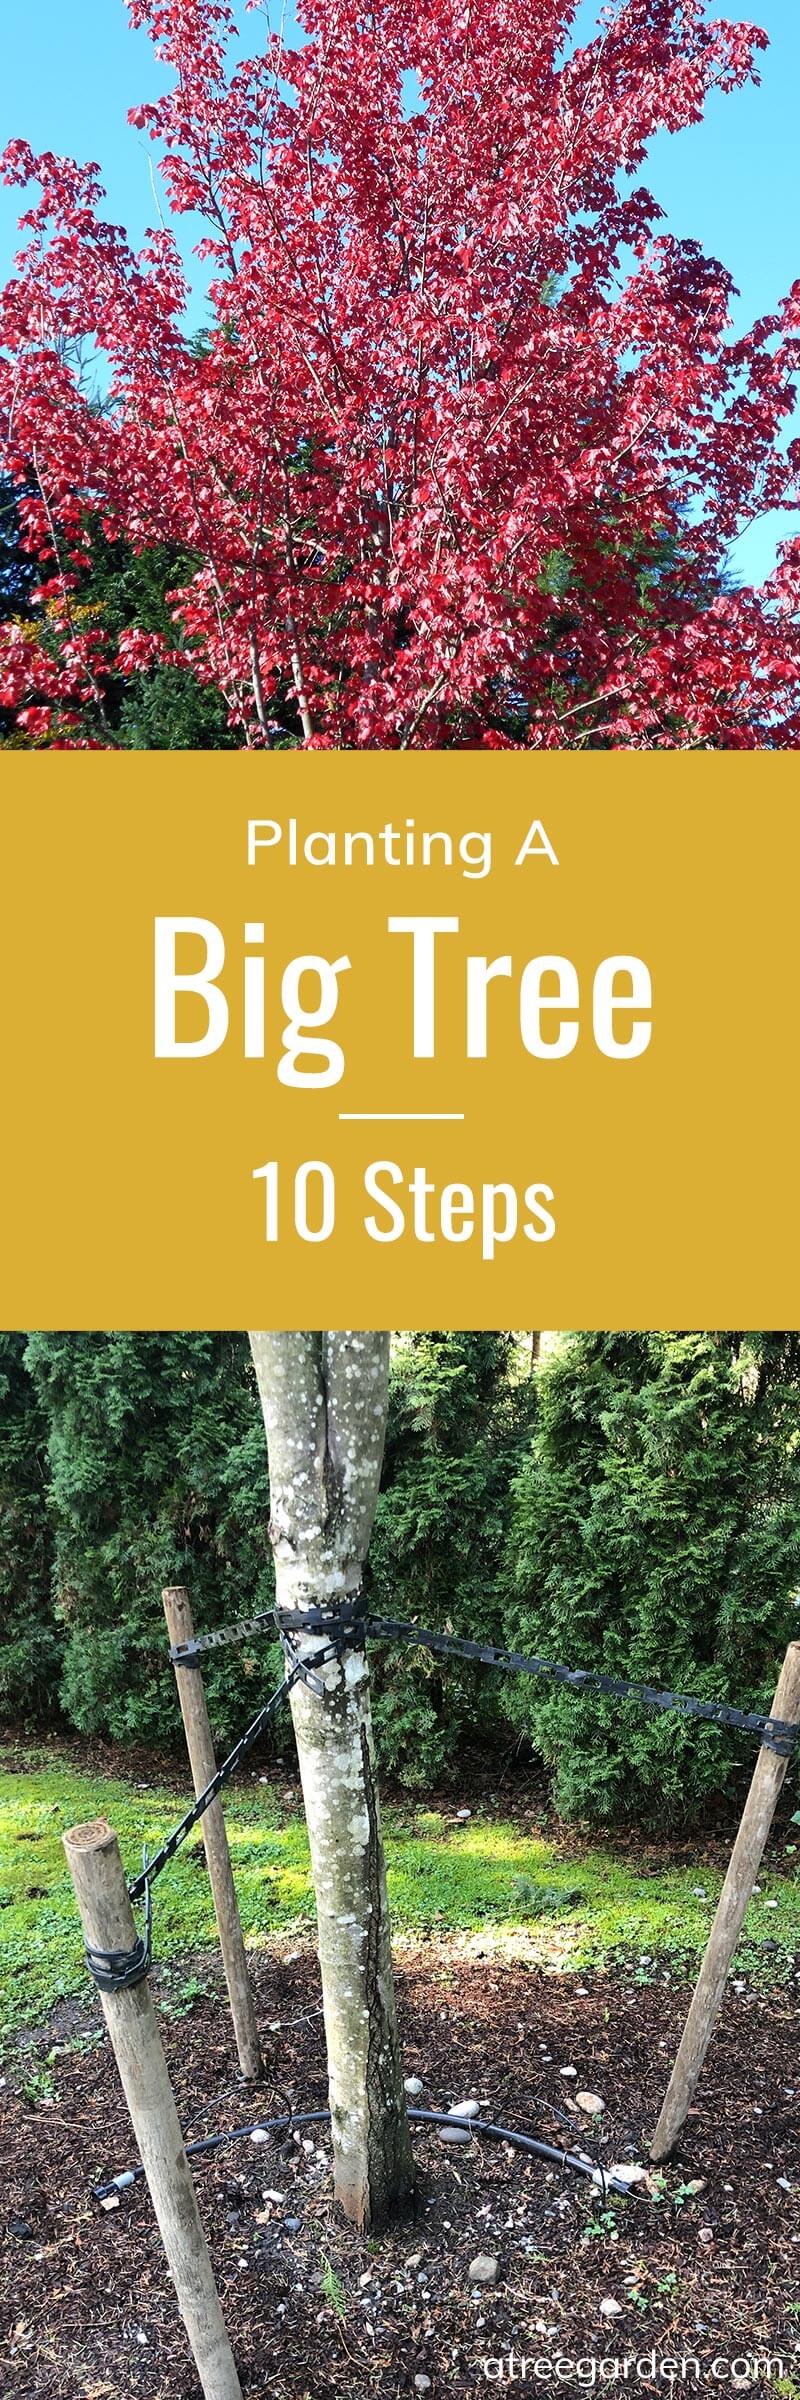
After a bit too much note taking, chart making and deliberation, we were sold on a Brandywine Red Maple with a 5.5 caliper trunk width. I had the opportunity to go back to the farm and pick the exact one, all of their trees were in good shape but I trusted them to do that for me and saved myself a trip.
Although a red maple will lose its leaves (and thus privacy) in the winter it will offer the following benefits:
- A solid privacy screen when leafed out
- A visual complement to the surrounding evergreens.
- Brilliant red fall color
- No samaras aka, “maple keys”, “helicopters”, “whirlybirds”
- Low maintenance and generally pest free
- Tolerates a wide range of soil conditions (ours is a bit wet in that spot)
- The right size (already about 25 feet tall, will grow to 40 feet tall 30 feet wide, depending on who you ask)
We figured we wouldn’t be outside all that much in the winter so the screen isn’t as necessary then. And we’ll still have our row of arborvitae that will continue to grow for year round privacy (though I think they are reaching mature height).
10. Schedule Delivery and Planting
Because our planning and tree-picking happened well into summer, fall was the next available planting opportunity. Trees, especially big ones, are ideally planted in early spring or fall, when they have a chance to settle in before the growing season. So we set a date for October 26.
As the date neared, the nursery made the necessary call to 811 to mark utilities. Luckily we had none in the desired spot (whew). On planting day, a team of 5 men arrived during the scheduled 2 hour window with the canvas-covered tree situated on a flatbed truck. I met the foreman and we confirmed the exact spot, and I confirmed that no utilities or irrigation systems were in our way. Four of the men grabbed shovels and started digging, creating a pretty massive hole in a short amount of time. Once the hole was dug, the team moved the tree to a specialized forklift, scuttled it gingerly across our yard, then eased it in. The foreman confirmed my approval on the tree’s rotation, the workers backfilled the hole, then staked it. It was really that simple.
After the team finished planting, the foreman gave me some instructions and answered some questions. He showed me how to hook up the irrigation system and when and how often to water. They also recommended removing the stakes at end of the following summer. (I immediately ran inside and took notes on our conversation because I knew I wouldn’t remember, and I’m glad I did as I’m writing this, trying to recall exactly what he said).
Here’s a short slideshow of the delivery and planting. Hope the workers don’t mind being famous.
Bonus step: Watch it grow!
And now, 4 months later, I’m excited to watch our Brandywine maple leaf out! I’ve been checking the buds every week since the days have gotten longer, and through my trusty binoculars I can definitely see some growth toward the top of the tree. I’ll update this post with photos (I promise) when the blooms and leaves appear. I can’t wait!
Additional Resources
Here are a few resources I dig up during the process.
Big Tree Suppliers
Not officially endorsing any of these, they are just a few options I came across that might save you 5 minutes of searching!
Siting Tools
Get help selecting a tree with the Tree Wizard at the Arbor Day foundation website
Soil Drainage
A short article about improving soil drainage for trees
If you made it all the way to the end of this post, I’m impressed! I hope you found some useful bits in this way-longer-than intended writeup. If you end up having your own big trees installed, please tell me about it in the comments, I’d love to hear how the process went for you!
0 Comments