
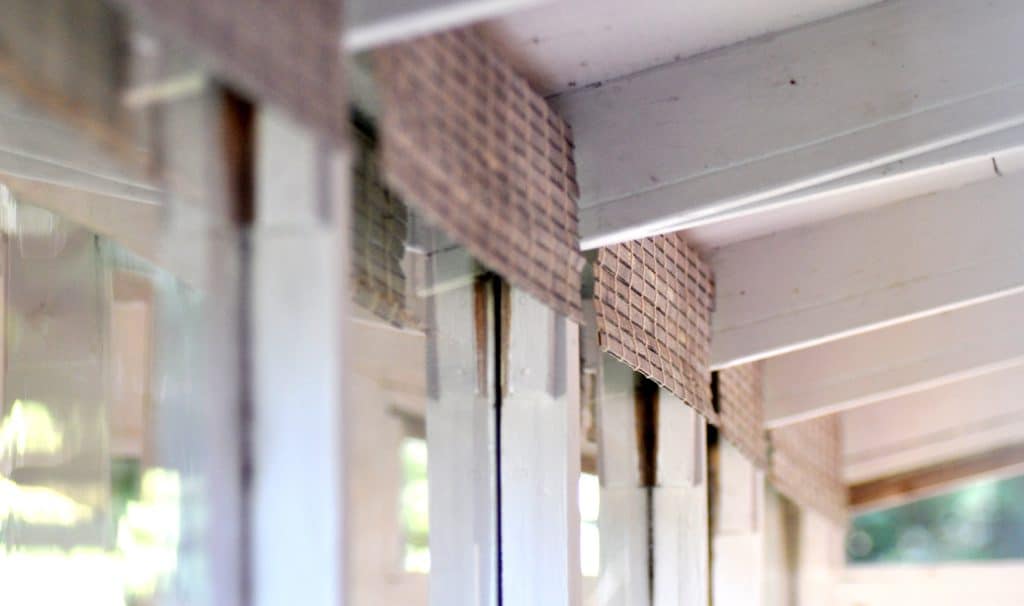
One of the challenges I faced in finishing out the sunroom was figuring out how to hide the dirty fascia visible through the top part of the windows. Over time, pine needles, insects, dirt and other nasty stuff had accumulated in the 2-inch space between the glass and wood. Because the glass is permanent, there isn’t a great way to access that space, especially given that it’s 15 feet from the ground. Even if I could clean it, I didn’t think it would ever look that great due to the uneven gaps between the fascia and roof underlayment.
Full-length blinds were a possibility but would have been pretty expensive and a bit overkill in my mind. And there’s one weird window that’s only 13″ wide, which meant I’d need to do an extra-special order, adding to the potential cost.
So I decided to try making bamboo valances. As it turns out, nobody sells bamboo “cloth”. The solution I came up with to get the natural bamboo look I wanted was to buy a premade roman blind and piece it out. It ended up working out great. The biggest challenge in this process was dealing with the weird construction and odd window sizes. Anyone with normal windows would have a much easier time. Even so, it wasn’t that difficult, and pretty rewarding at the end!
Finished Project
A preview of the final project. It’s super hard to take a decent photo in this long skinny room, but here is one view.
Before
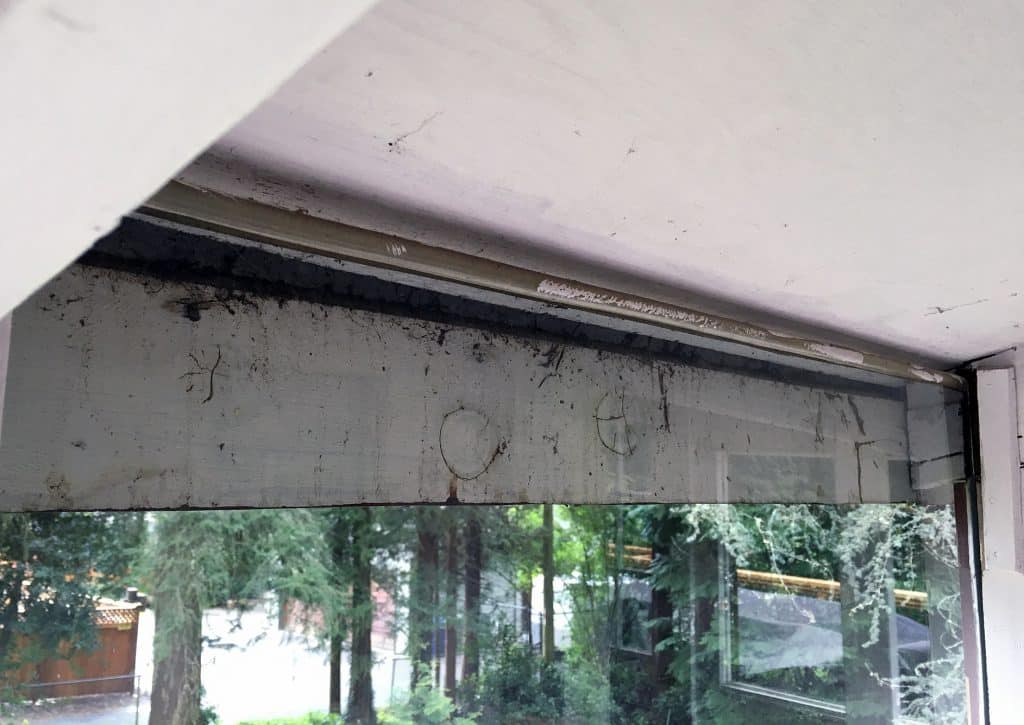
Yuck! I didn’t think I could get this looking anywhere close to clean, so why not just cover it up? Out of sight, out of mind…
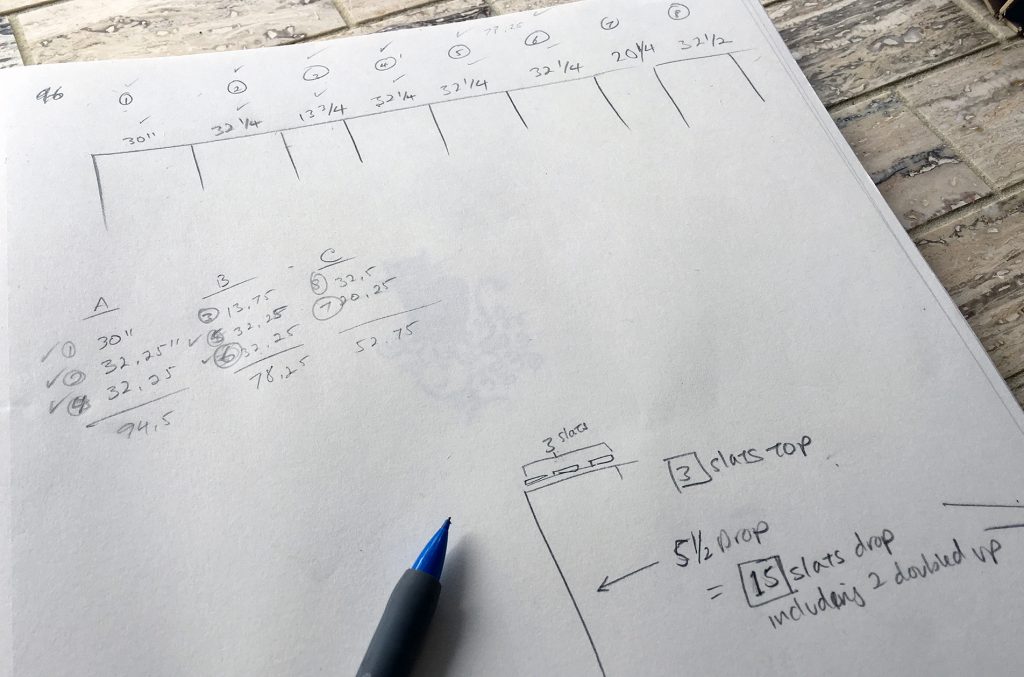
My master plan. The top illustration denotes the measurements between the windows, which I used to cut the rods from 1/2″ x 2″ lumber. The “A B C” part is me figuring out how many lengths of 8′ lumber I needed for all the rods. The bottom illustration is my plan for the number of bamboo slats I need for each valance to just cover the unsightly gutter mess. The faint drawing underneath this paper is a lady with a cat on her head.
Prepping the Rods
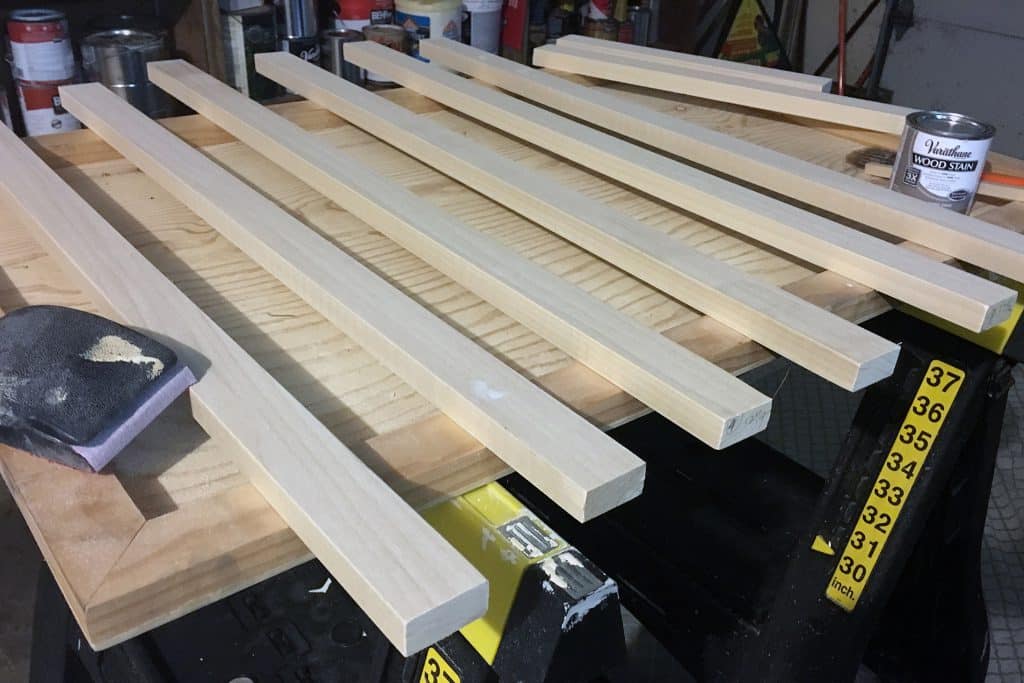
Here are the rods cut to length from 1/2 x 2-inch poplar. Because I wasn’t paying attention, I paid a pretty penny for nice wood that’s going to be completely covered up. I should have bought pine, but I came across these first at the hardware store. By the time I realized my mistake, I was at checkout and too lazy to go back!

The circled numbers identify which window they’ll be attached to. I sorta mixed them up toward the end but it worked out anyway.
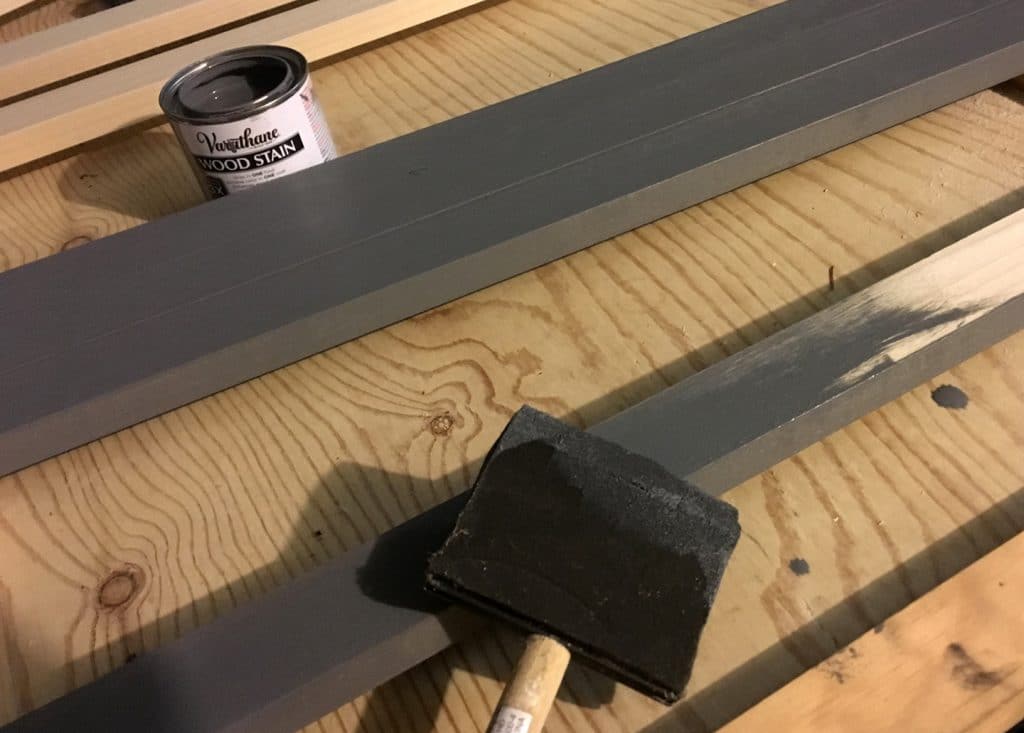
Applying stain. This step may not have been necessary, but I wanted the rods to be as invisible as possible since there are gaps between the bamboo slats. I didn’t use a finish, just this Varathane Wood Stain in Weathered Gray. I let these dry and moved on to cutting the shades.
Prepping the Shades

Here’s full shade the from which I trimmed all the valances. More than half the windows are 31.25″ wide, so that’s the width I ordered in a 72″ length. It cost about $70 through an online purchase from Home Depot.
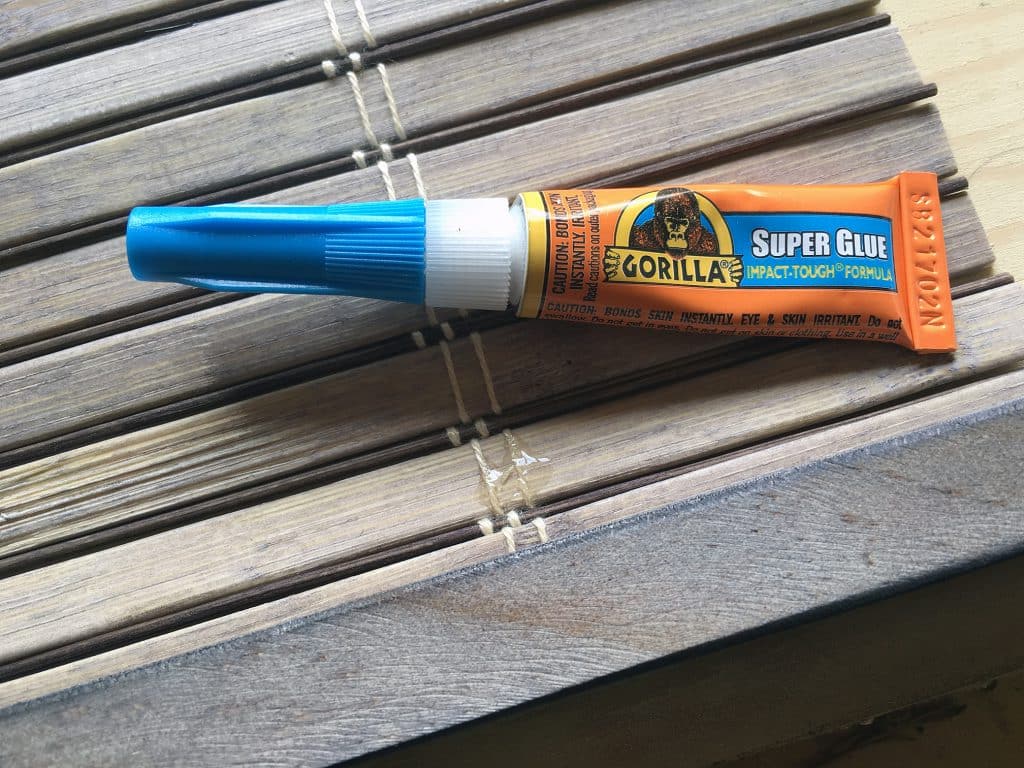
To keep the whole enchilada from unraveling, I used superglue to attach the strings to the bamboo on the slats above and below the place I planned to make the cuts. This stuff dries pretty quickly but I still managed to get some on my hands. I’d recommend using gloves.
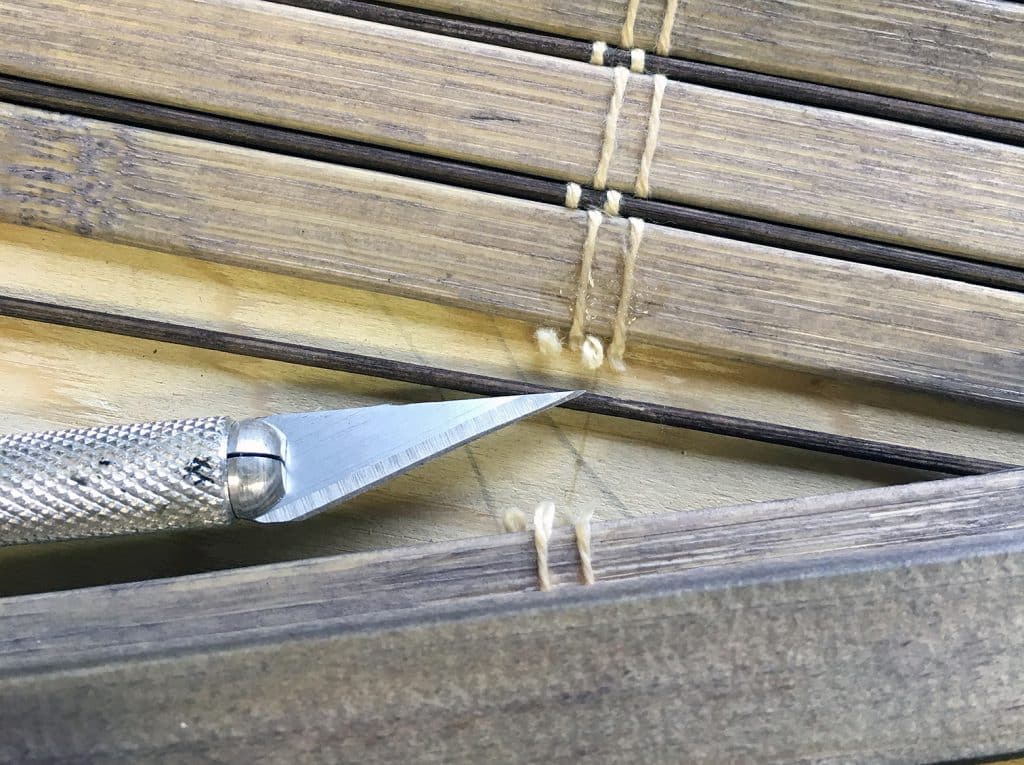
Making the cut! The glue held fabulously. I used an Xacto knife but a utility knife would work too.
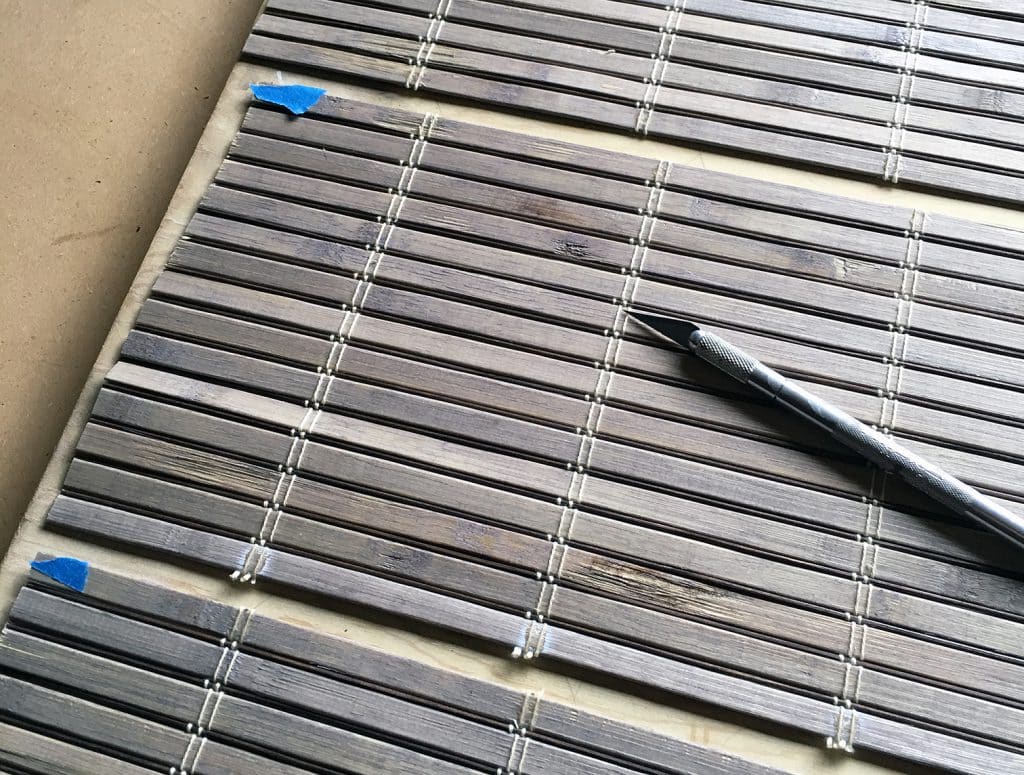
Cutting the valances. Before I glued and cut everything, I used the blue tape you see here to mark the slats below where I would make the cuts. Each section is 15 slats tall.
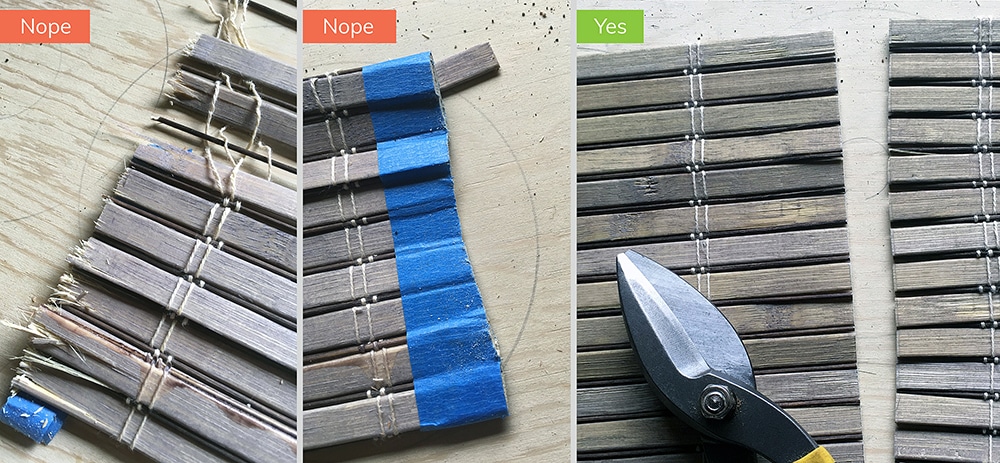
Cutting to width. Next, I needed to trim 3 of the valances to match the narrower windows. I used some scrap strips to test my cutting methods. From left to right you can see my results with 1. An electric miter saw with a 100-tooth blade (bad and scary, I won’t do that again), 2. A hacksaw, which I’m particularly unskilled at using and 3. Sheet metal snips. I obviously had the most success with number 3. I think my snips were even straighter than the factory cuts!
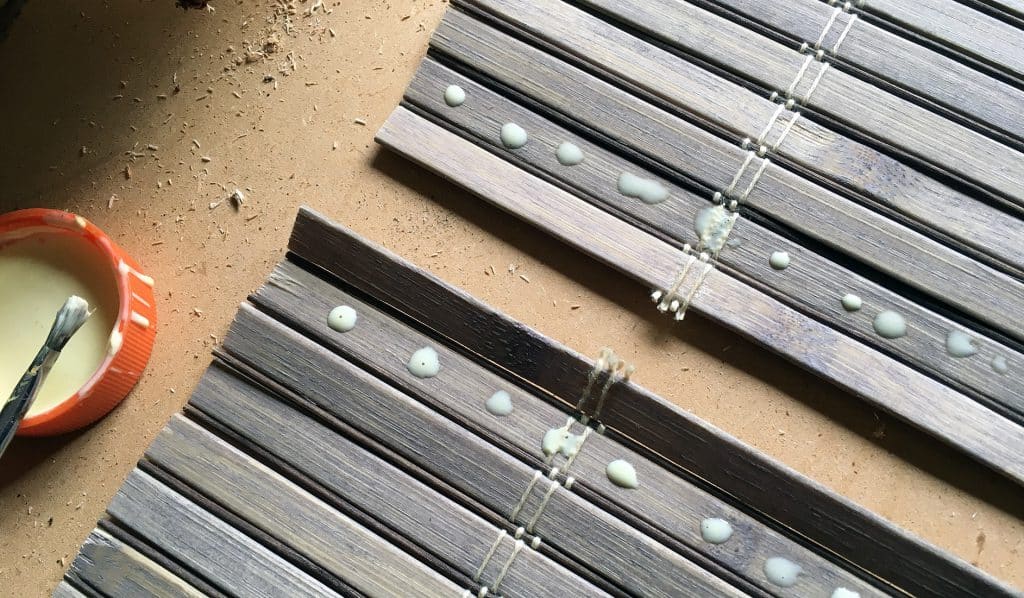
To hide the messy strings ends and make a finished edge along the valance bottom, I folded the bottom slat under and glued it. I used wood glue, but I imagine a hot glue gun would be faster. Not making a hot mess with hot glue is not in my skill set, so I opted for what I know. Use enough glue to bind the uneven slats, but not so much that it squishes out the sides when you fold it over. The dot system you see here worked well.
Mounting The Valances
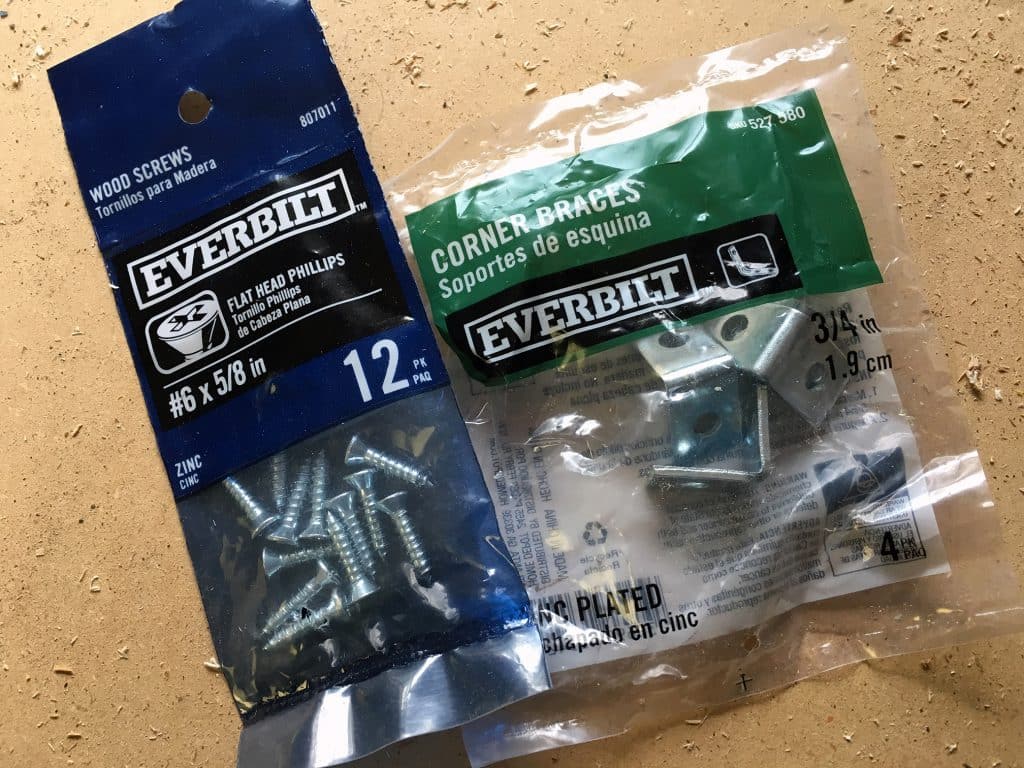
Since the valances and rods are so light, I went with the smallest braces I could find.
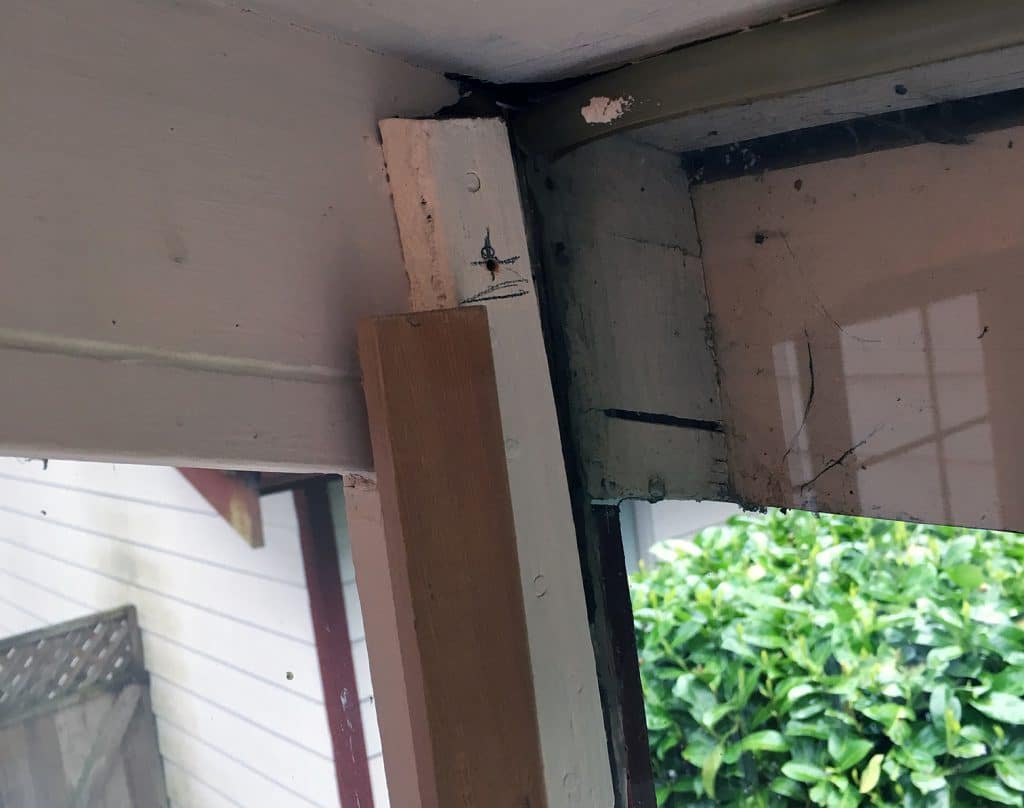
I cut a piece of scrap lumber to the exact height I wanted the bottom of the brace to sit, measuring up from the countertop. The countertop is much more even than the ceiling, so I used that as my base. I then marked each of the vertical sash with my new measuring stick. I took this photo is after I drilled, but hopefully it illustrates the idea. The sequence is: mark the stick height on the window sash, hold up the bracket (not shown) so the bottom sits on the mark, mark the hole, then drill the hole. (There’s a cross on this one because I drew the hole in the wrong spot the first time!)

Once I the braces were attached to the uprights I could mark the location of the holes on the rods.

Drill the marked holes on each end. I recommend wrapping the drill bit with a piece of tape to mark the depth you want – otherwise it’s easy to accidentally drill through the other side.

Stapling time. I used more blue tape to hold the valance in place on the rod so it wouldn’t shift while I was stapling.
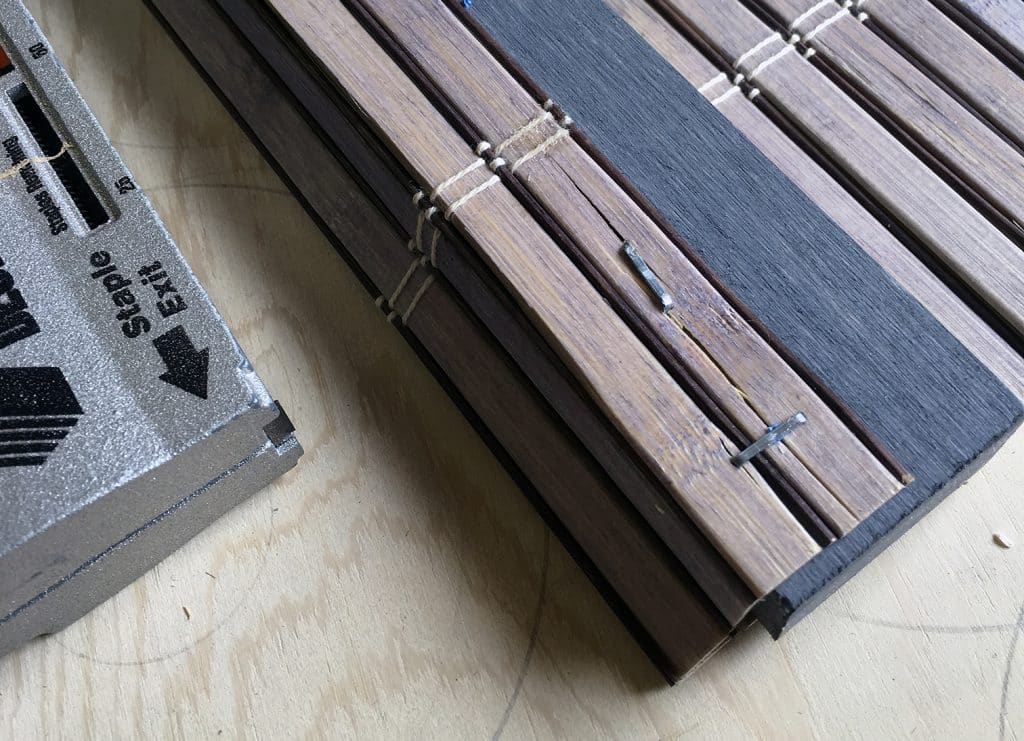
Staple gun for the win! That is, if you apply the staples perpendicular to the slats, not parallel, which splits the bamboo. This was my test valance, and I ended up redoing it in part because I wanted 3 slats on top of the rod instead of 2, just to make the valance a little shorter. Ultimately I stapled these (perpendicularly) about every 5 inches.

Installed valance. This part was fairly easy once I figured out which valance belonged to which window.

Another shot of the final valances installed. They’re all lined up nicely, and long enough hide the crud but short enough to let the sunlight in!
This project went pretty smoothly and I’m super happy with the result. Having the right tools definitely helps, but if you are lucky enough to have new, evenly spaced windows you many not need as many as I did. Overall I’d say this is an easy DIY project and if you are into the bamboo look for your space, definitely give it a try. And if you do, let me know how it turns out!

This is a great job of giving the top of your windows a finished look. I would like to use a bamboo roman shade or even a bamboo roll up blind as a valance to cover the top of the roll up blinds I have behind my curtains in my living room windows. When the curtains are open you can see the roll up mechanisms at the top of the blinds. The same material as the blinds would blend and not be too busy. Unfortunately the window is a couple of inches wider than the 72″ blind. I will have to figure out how to combine or add some width to the valance.
Thank you pip! Your windows are pretty wide, that sounds wonderful – but tricky to cover with a single valance! Perhaps you could could make smaller valances and bind together with a fabric “tape”, similar the decorative drill-hole coverings on some wood blinds. Good luck!
LOVE this look! Saw these bamboo place mats at the Dollar store the other day, I wonder if it would work. Great inspo as usual. Thanks
Hi Daisy, I bet those would work! Thanks for your comment!
Love it! I have been trying to figure out an inexpensive way to do something similar, since we’ll be replacing windows eventually (or moving). I tried the placemats idea, but they are not wide enough, and would have to double up, which then obviously looks like placemats hanging there! I will use one shade for three 26” wide windows, and mount on tension rods so they aren’t permanent. Thx for the inspiration!
Hi Jennifer, you’re welcome! Using tension rods is a fantastic idea, I didn’t even think of that! Good luck with your project!