
Back in December, I determined that 2020 would be my year for successfully growing starts in our new(ish)ly finished out sunroom.* The challenge is that our sunroom isn’t really…sunny. It’s graced with plenty of south-facing windows, but sits in tree shadow most of the day and sadly has a solid roof with no skylights. As with most indoor growing situations I knew I needed supplemental light. Thinking about my goals, I determined that I wanted:
- 3 separate lighting units with individual height adjustment. I wanted to start with 3 seed trays/stations I’d likely start at different times.
- LEDs, for their low cost of operation, low heat output and longevity. The room heater and heating mats already suck up a bunch of energy so I want to save where I can.
- Evenly cast light across all the seed cells. A few years ago I tried to grow starts with a single-bulb T5 fluorescent, and ended up with lush seedlings in the middle and sad stumpy ones along the edges.
So queue the online search for grow lights. In short order I found myself appalled by the cost of lights that satisfied all of these goals. I’m usually all in for buying things for hobbies I enjoy, but spending a bunch of money on lights meant I’d have to stick to it for several years to recoup the cost. I didn’t want to foist guilt on my future self like that – what if I decided to ditch seed starting for knitting next year? Can you tell I’ve done this to myself before? Then I happened upon this relatively inexpensive set of 6 LED light tubes. They are packaged with some basic fixed mounting options, and I decided I could use those parts to construct my own adjustable hangers. Once the DIY idea was in my head, a quick assessment of our scrap wood selection showed I could probably create the hangers without buying additional lumber, if my initial design idea passed muster. (I was not so bold as to assume I wouldn’t have to buy any hardware, however I think I actually accomplished this project with only one trip to the hardware store, if you can believe it). I could get all explainy now with how I ended up with the final design, but this preamble is already way too long, so let’s dive into the actual build.
Final Lights
So you know where we are going, here is a shot of a final fixture.
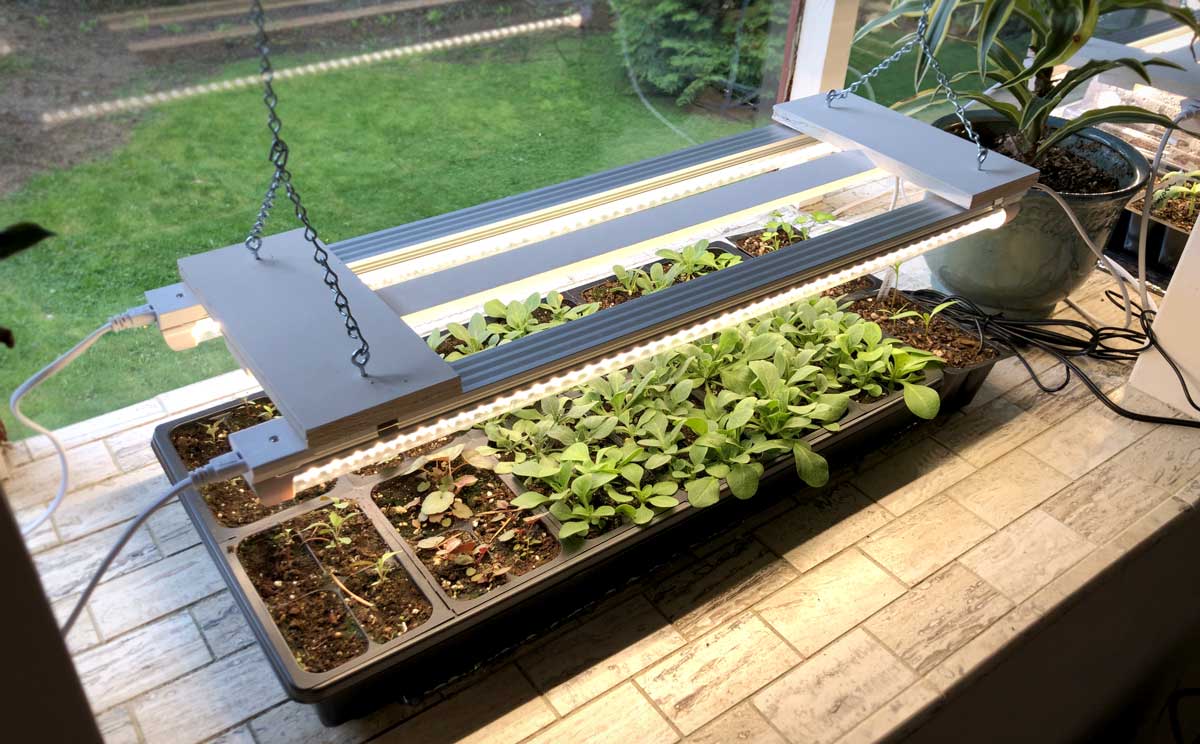
It looks pretty good with the rest of the sunroom I think! If you are curious, the starts from right to left are: Peppers and parsley, a whole slew of petunias, coral bells, and finally a mystery shrub that I collected berries from last fall. Fun!
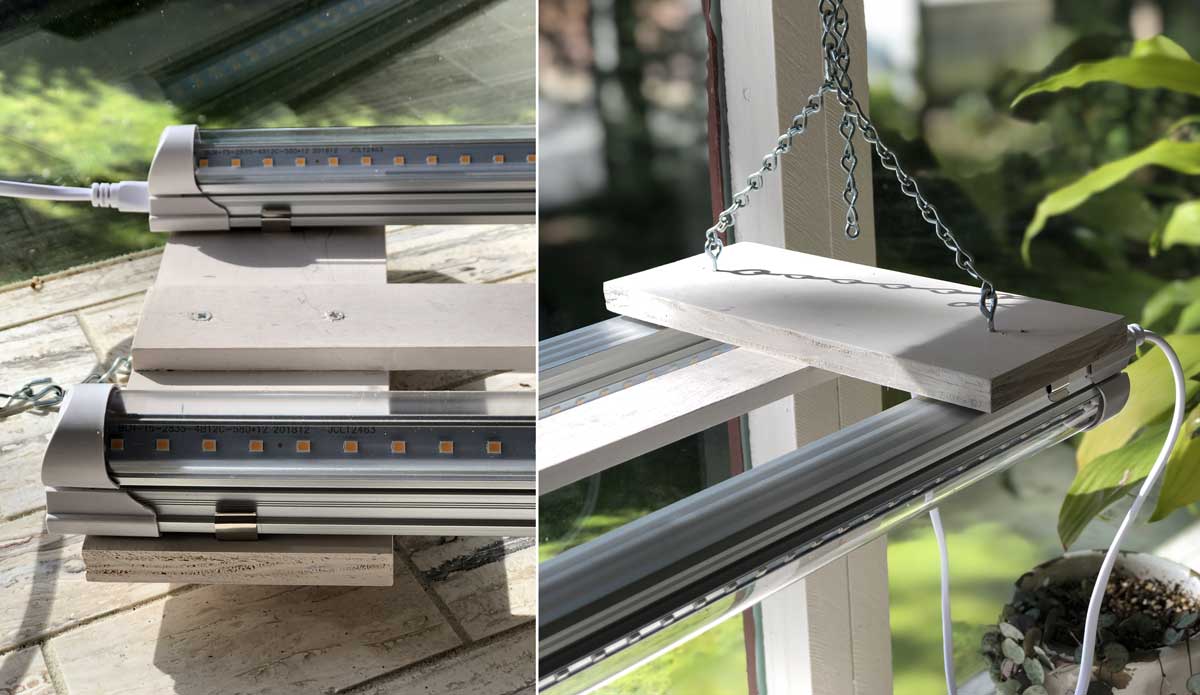
A closeup to show construction bits.
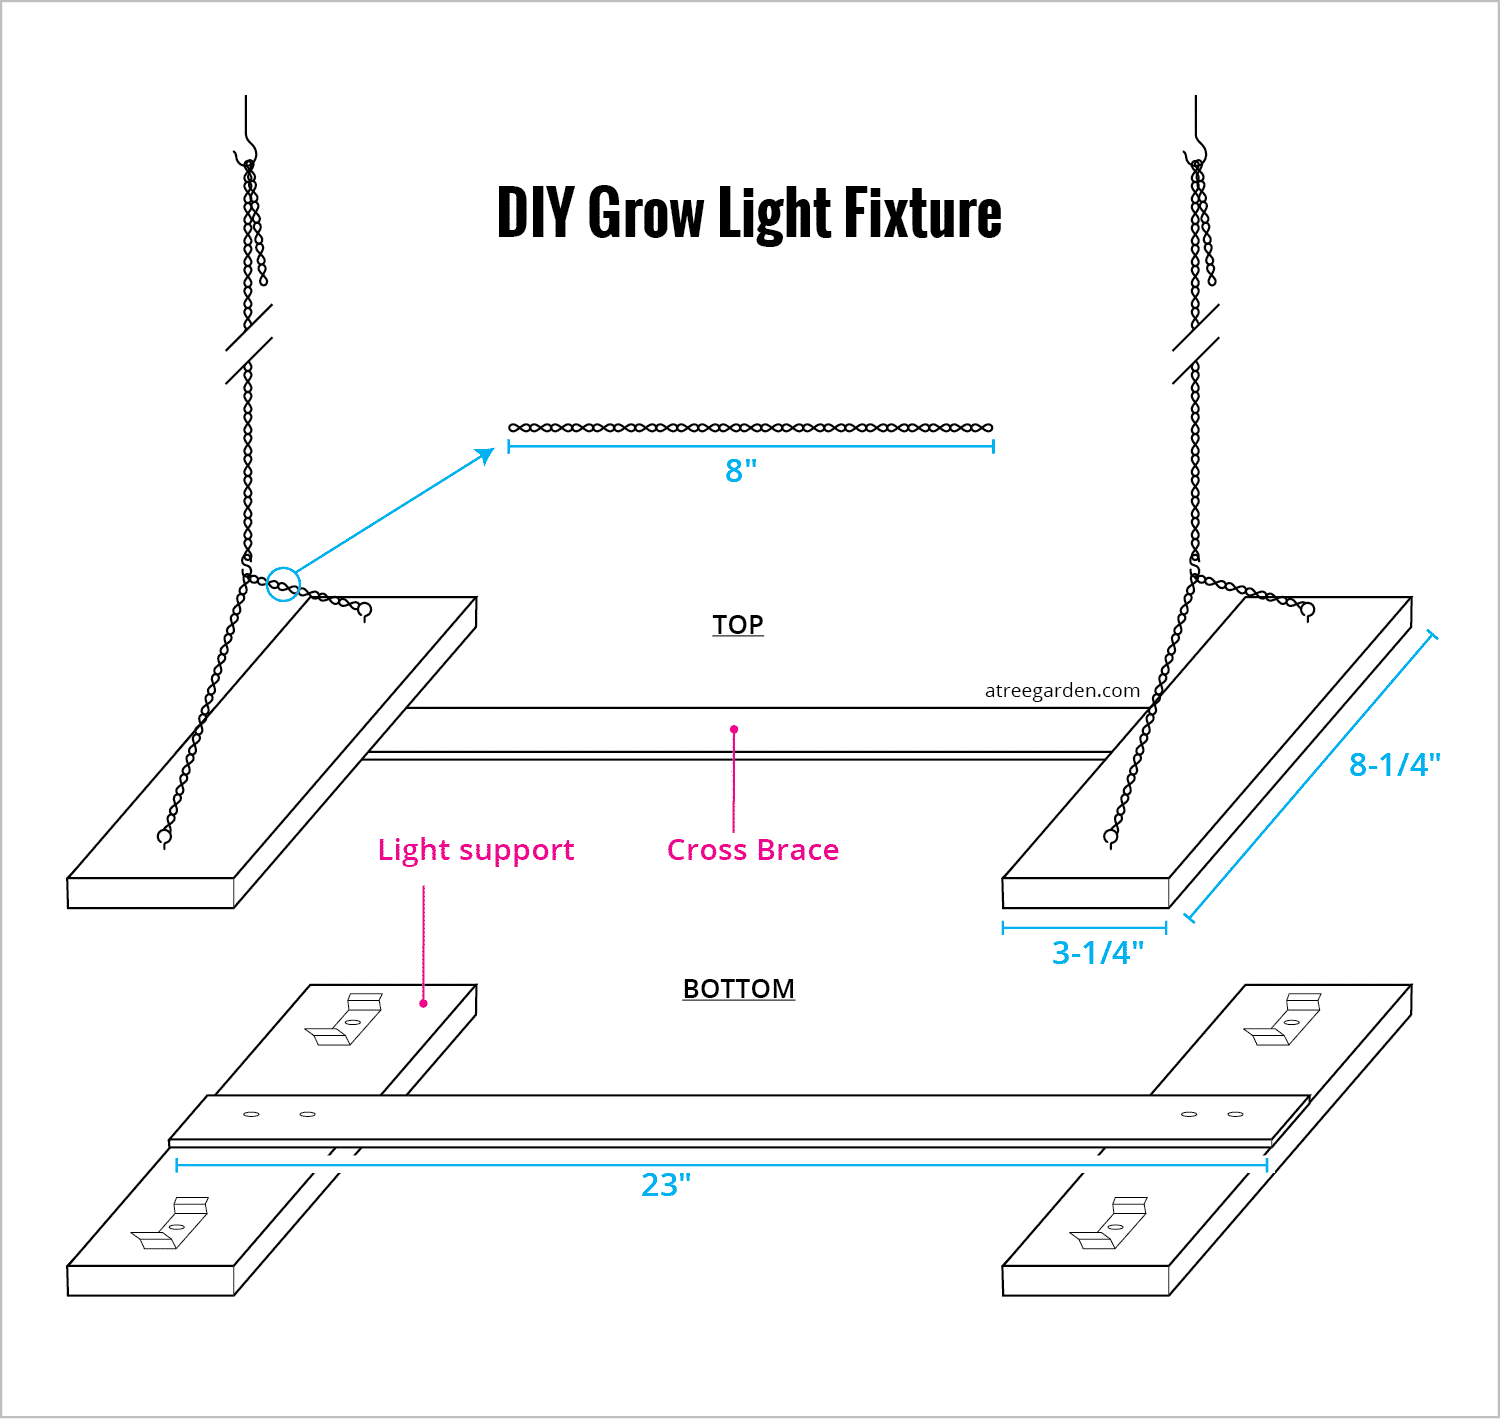
A (Maybe) Helpful Diagram
Materials List
- Grow light strips (I bought these, which are sadly out of stock at the time of this post)
- Wood for light supports (I had ½” cabinet plywood on hand)
- Wood for cross brace (I had ¼” x 2″ x 4′ poplar on hand
- Light duty Chain (Zinc Plated Steel Jack Chain – I think I used #14)
- #212 Screw eyes
- ¾” S-hooks
- Small screws (shorter than your board depth)
- Zinc-Plated Screw Hook (I think I used #10)
- Paint
Tools
- Drill, bits and screwdrivers
- Saw (I used a chop saw)
- Square or ruler or measuring tape
- Sandpaper
- Paint pad
Note on the chain/s-hook/screw eyes above – you can use whatever sizes you would like, just make sure the chain loop fits into the hooks and screw eyes!
Cutting the Light Supports
I had some scrap ½ cabinet plywood already trimmed at about a 3-1/2″ width – I just needed to trim them to length. You could potentially use a 1 x 2 or even a 2 x 4 for the two light supports. Just make sure the wood is thick enough to hold screws – you’ll be screwing both the light clips and the cross brace into it.
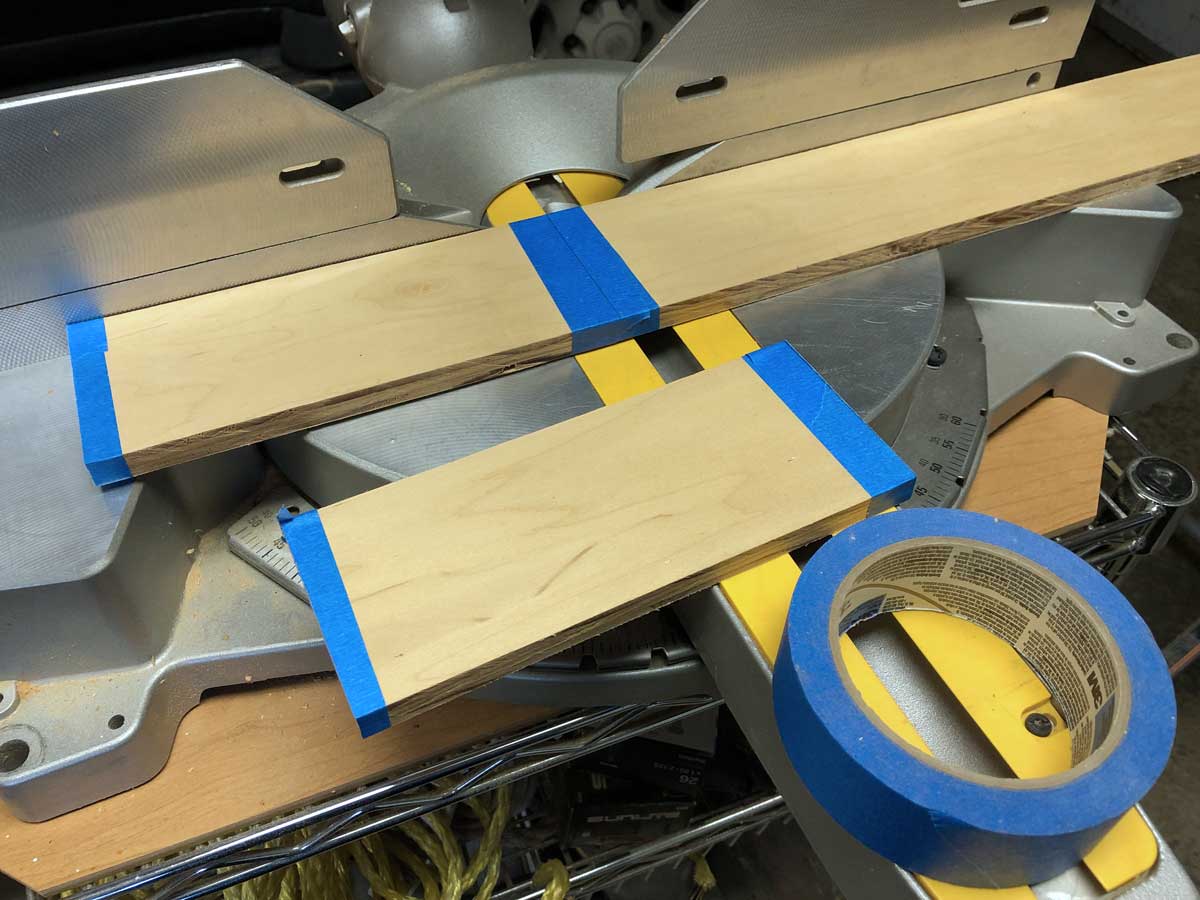
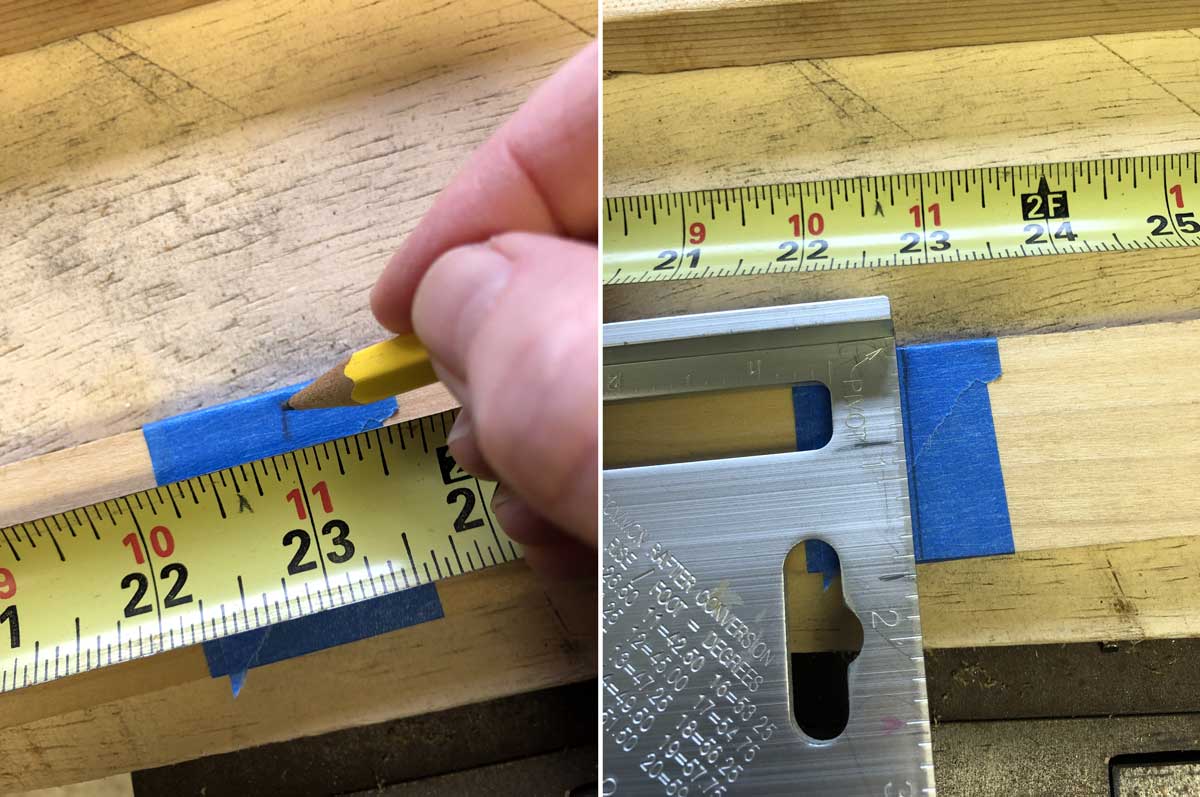
Here I’m cutting the light support ends. If using a power saw, first tape over the trim lines points with masking or painter’s tape to prevent the wood from fraying.
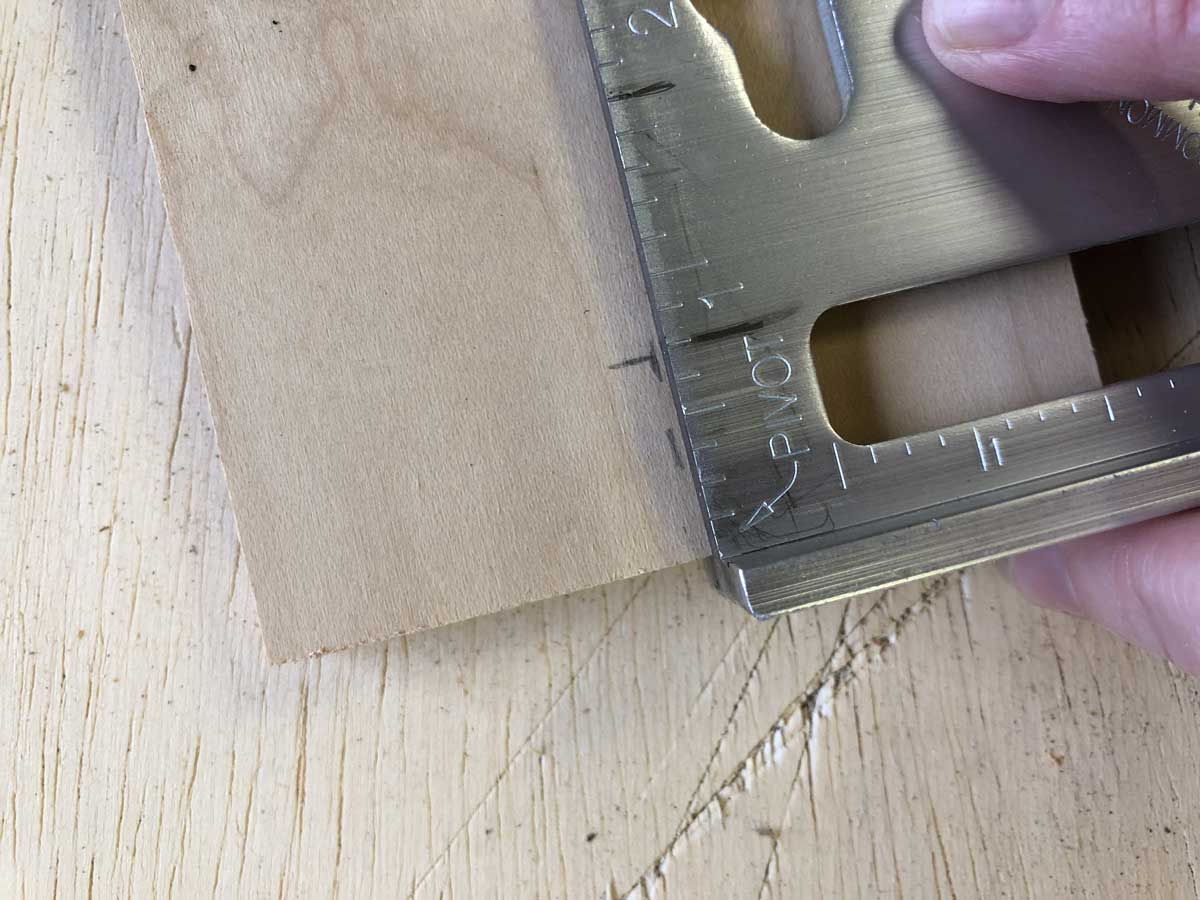
Once I had the supports cut, I used a square to mark where the screw holes need to be drilled. To speed up the process and prevent (or reduce) mistakes, I marked the measurements on the square with a pencil for the next board. As you’ll see in later pictures, I drilled 2 holes on each end – one to attach the light clip, the other to attach the screw eye for the chain.
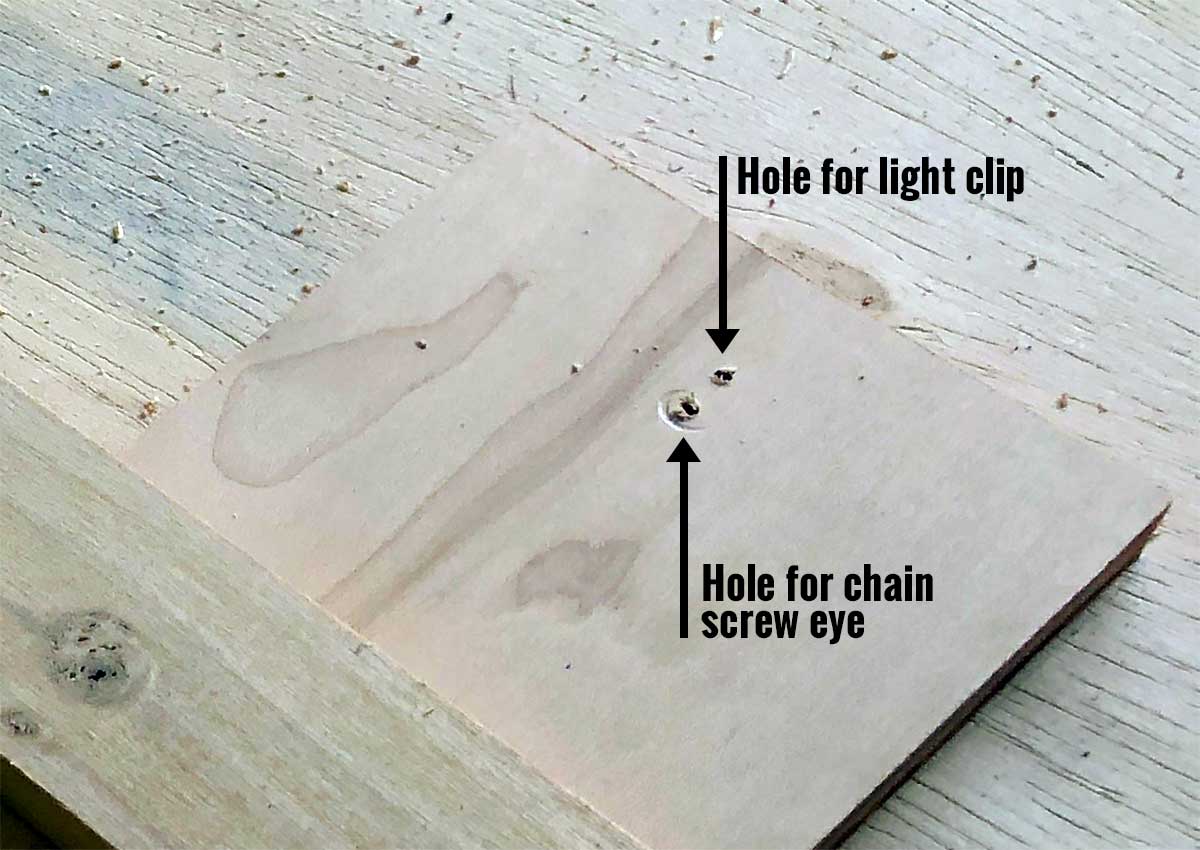
Here are the two holes drilled. I meant to drill the clip screw hole only on the underside, but fortunately for illustration purposes I accidentally drilled all the way through to the top! You’ll want to position these holes carefully (centered lengthwise and an equal measurement from the edge). If they are off by too much the lamp will hang cattywampus because the weight distribution will be uneven.
Test and Measure for the Cross Brace
You may be able to skip this part and cut the cross brace without testing, but I wanted to be sure reality matched my imagination (measure twice, cut once). If you have a product with sturdier clips, you may not need the cross brace – the LED units themselves can act as cross braces! I used ¼ x 2″ x 4′ poplar but you can use just about any type of wood. Just make sure you use a piece wide enough or cut long enough to accommodate 2 screws per end to prevent the whole structure from shearing.
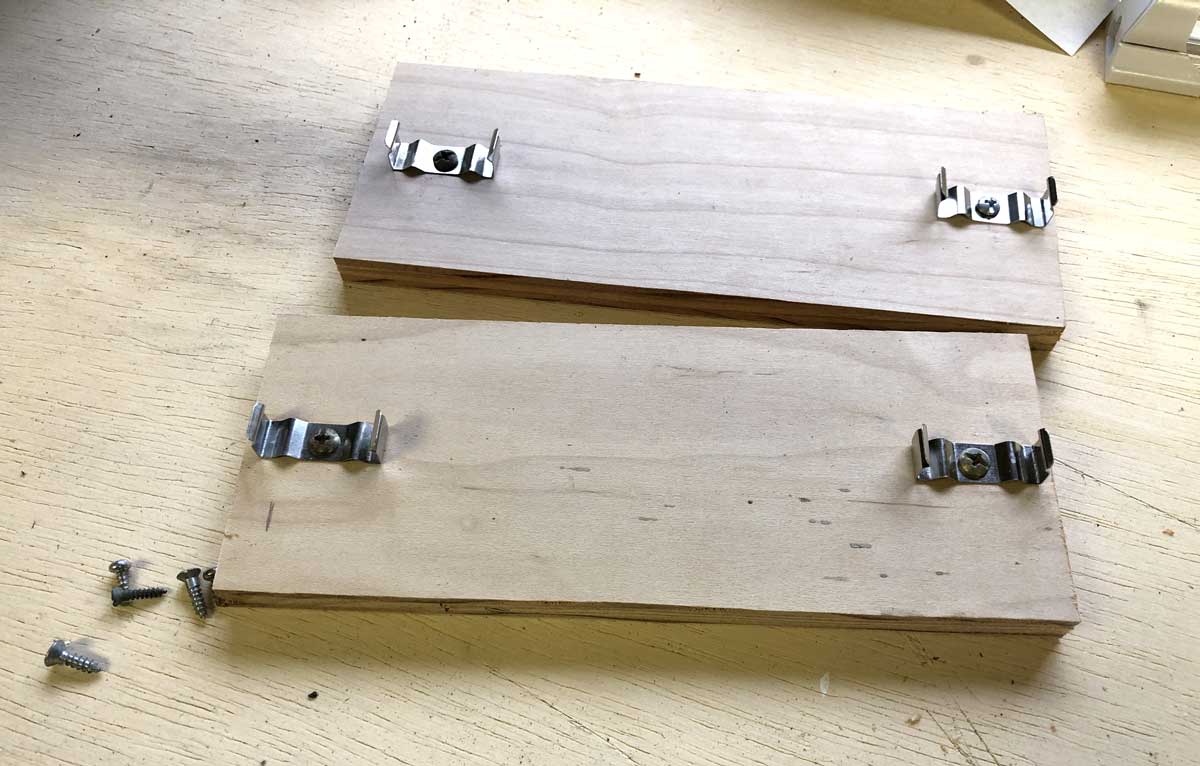
I went ahead and screwed on the clips so I could measure the cross brace length against the light tube length. If you look closely you’ll see the menagerie of wildly different screws I pilfered from our screw junk drawer. I actually didn’t have to buy any screws for this project! Yay for saving money, boo for having so much junk in our garage that I was able to do this.
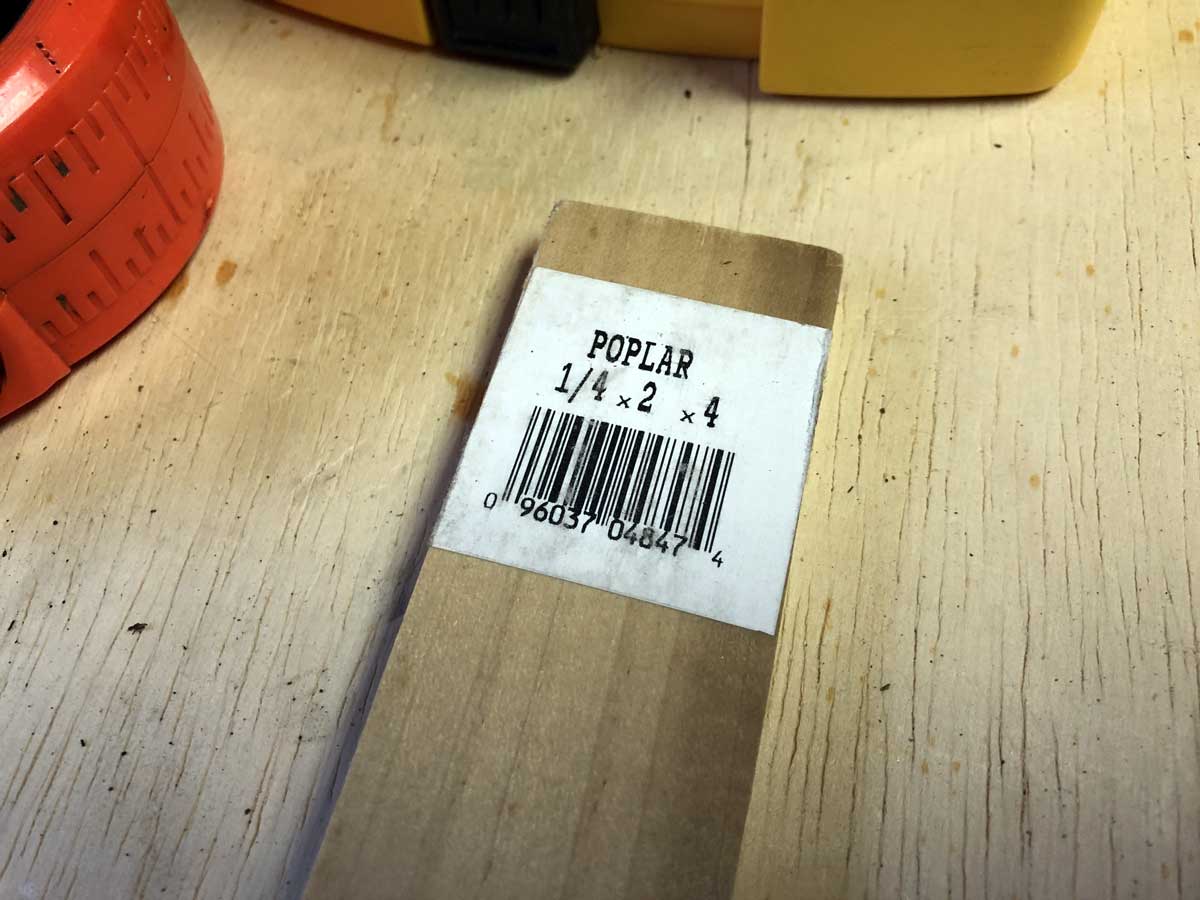
My cross brace pieces. Poplar is a bit fancy for this project, but we had some extra lying around.
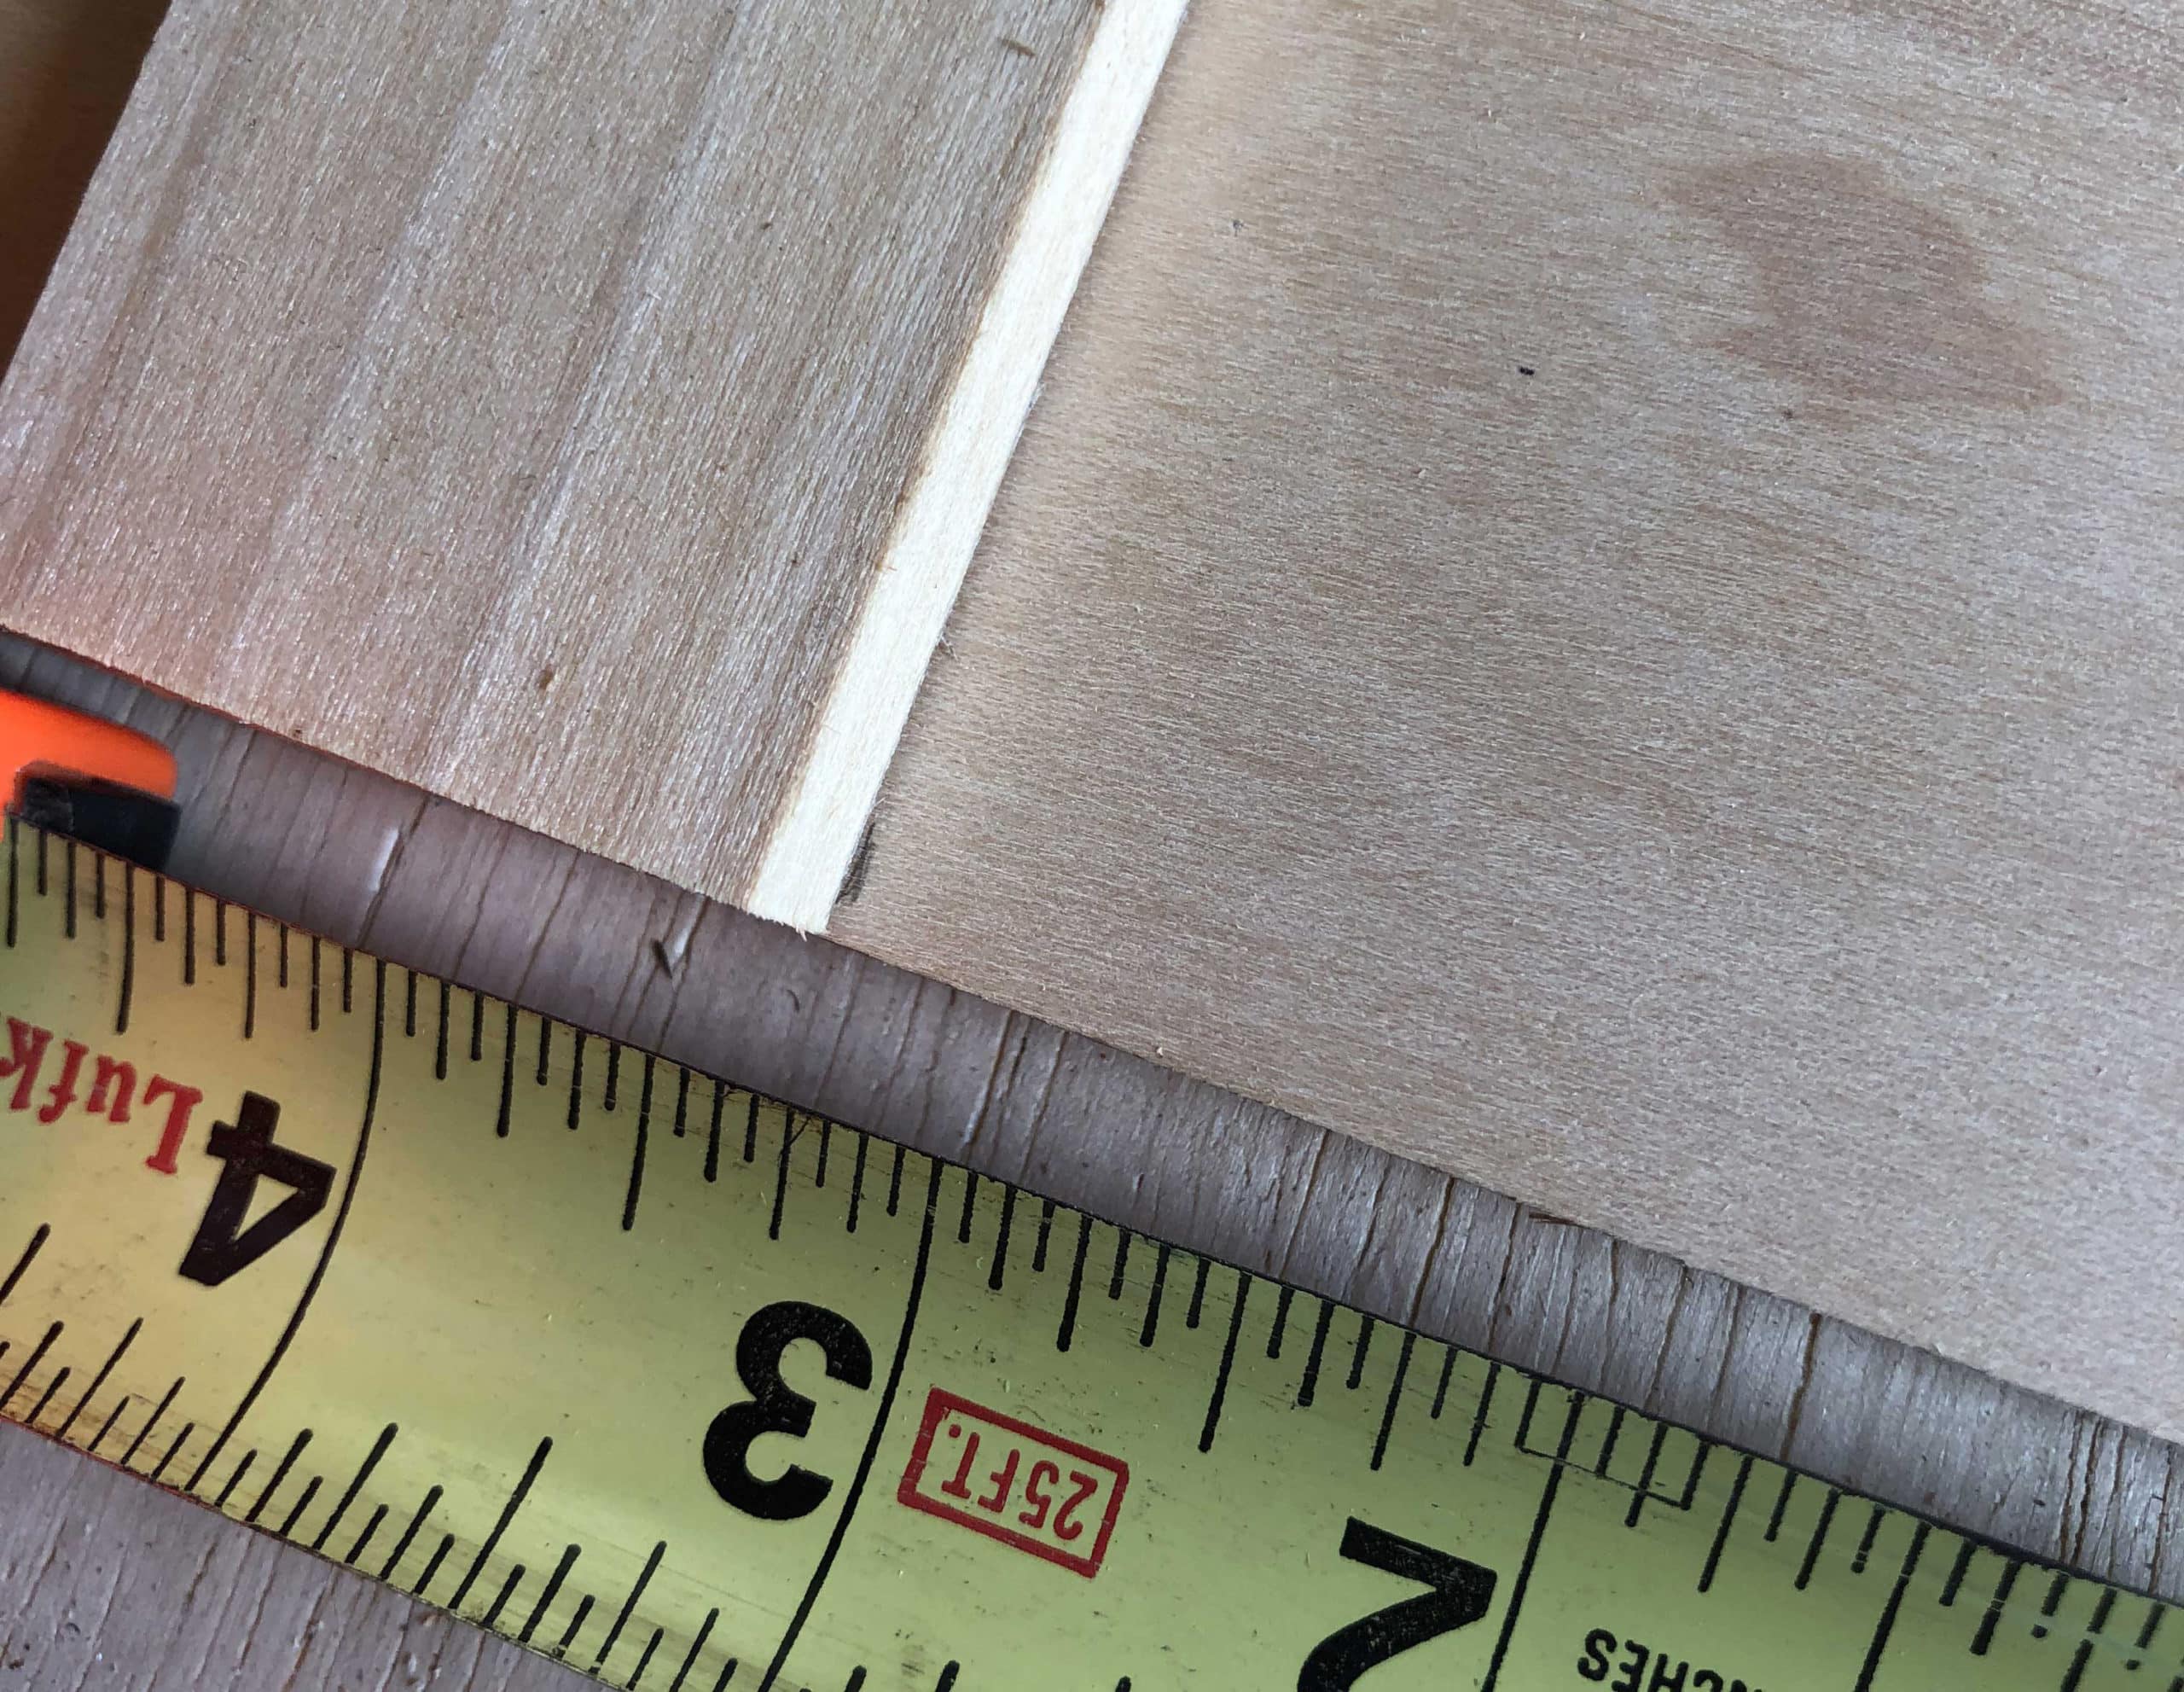
How I cut the cross brace: 1. Measure and mark the length. 2. Tape over the mark. 3. Measure and mark again. 4. Optionally create a mark fully across the tape with a square. Doing so helps me set board against saw blade at the right spot.
Center CrossBrace on the Supports and Mark
Math time! Subtract half the cross brace width from half the support width. Measure that amount from the edge of the support and mark it. Do this on both sides of the support. My measurement is 3-¼ inch from the board edge.
you basically want to center your crossbrace on the support board. Calculate this in a way that makes sense to you!
Clamp and Drill Holes
Once you are all measured and marked, clamp the supports to your work surface at the correct distance apart and drill the holes through your cross brace and into the support. I simply held the cross brace in place with my free hand.
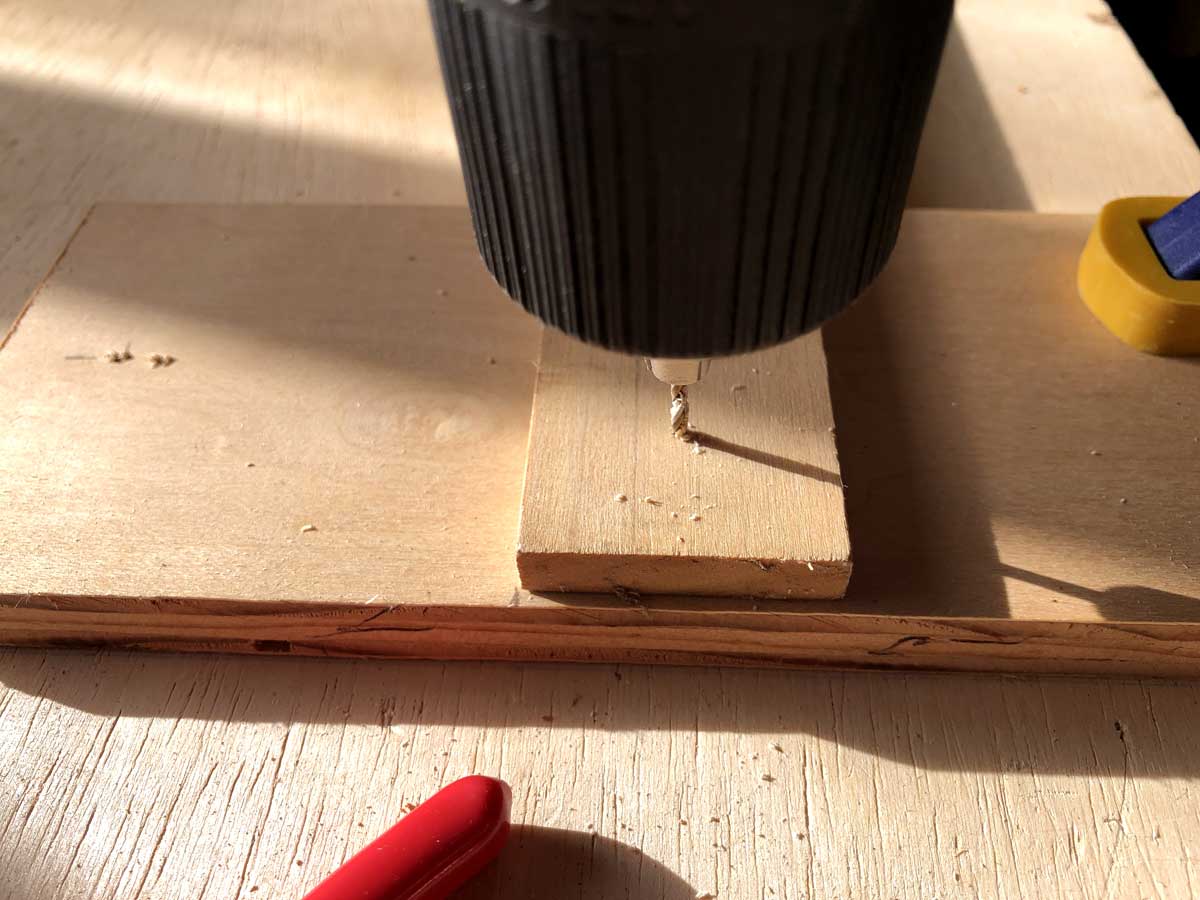
Make sure the drill bit is sunk into the chuck enough so that it’s too short to drill all the way through your support piece into your husband’s nice work table. Measure the protruding bit against the screw length – you’ll want the bit to be just shorter than the length of the screw.
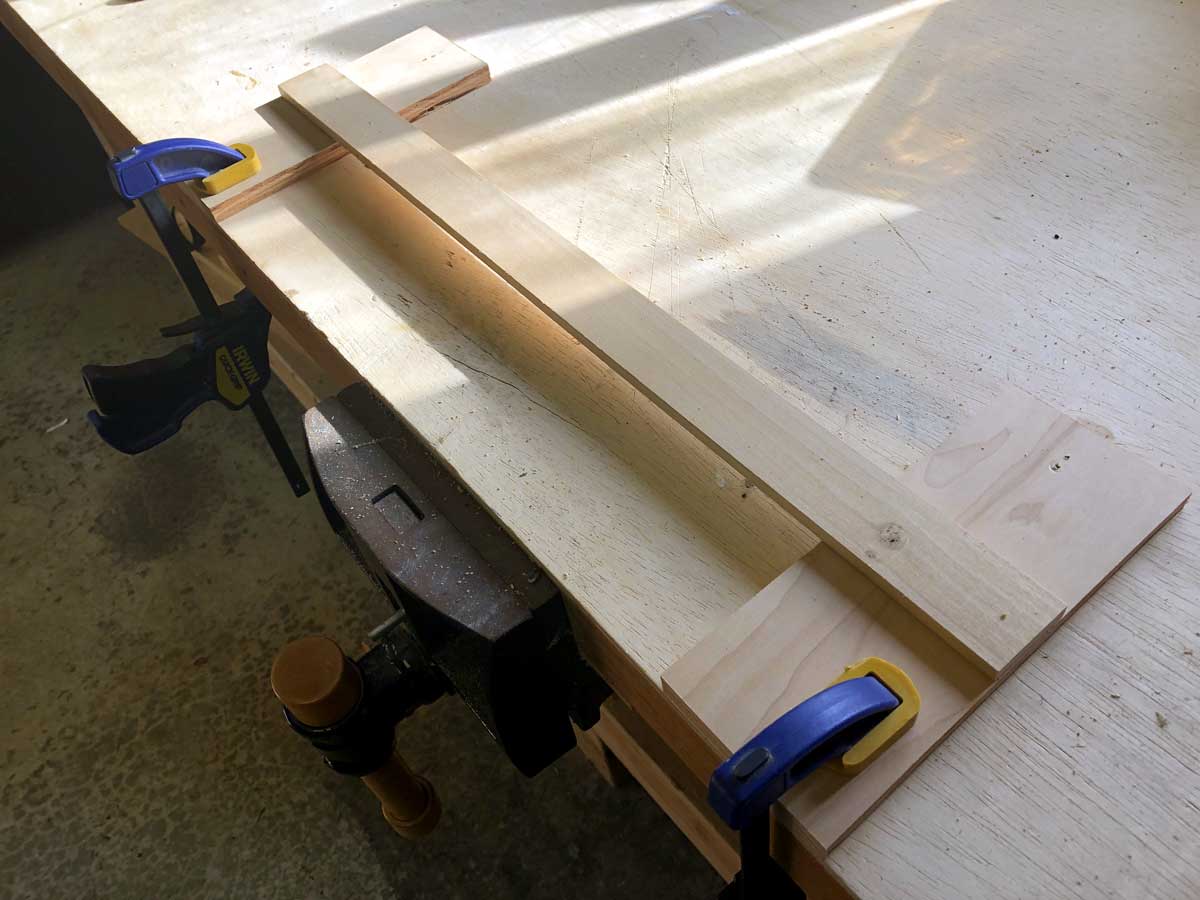
The full picture, with the right hand side hole drilled.
Fasten the Cross Brace and Paint
Next I screwed the cross brace in. I also felt like this was a good point to paint. I used some leftover house paint so the color matches the sunroom interior (neat) plus this spongy paint pad to lightly rub on two coats, cutting down on paint drips. I sanded the wood lightly with some 220 grit sandpaper before painting. 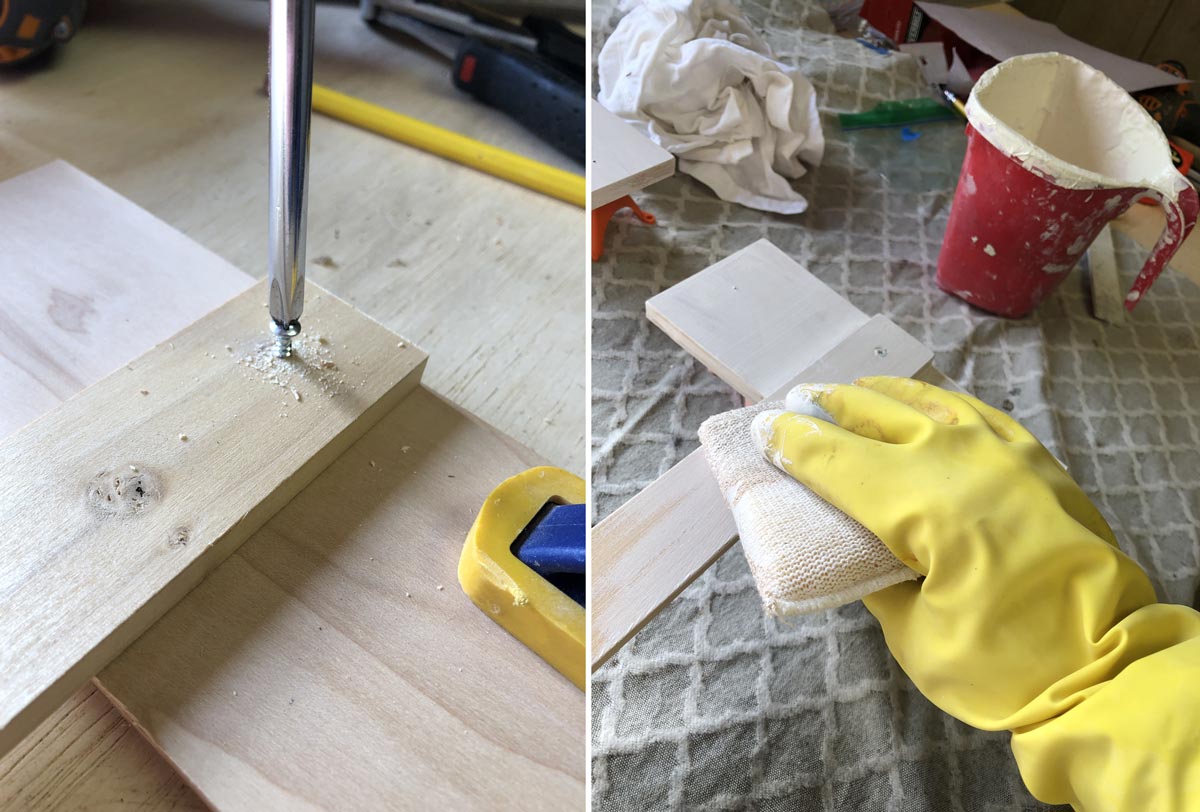
Trim and Attach the Chain
You need 4 lengths of chain for each light – 2 short ones that attach to the light, and 2 long ones that attach to the ceiling. I removed any excess chain by opening a link at the appropriate length with a wrench. The exact measurement of each chain depends on your ceiling and fixture width. I had to futz with the short lengths a bit make sure I ended up with an even amount of chain on each side of the S hook so that the light hangs correctly. Screw the eye hooks into your predrilled holes and attach the ends of the short chain by opening and closing the end link around the eye hook. You’ll attach the middle link of the short chain to the ceiling chain with an S hook, then attach the ceiling chain to the S hook and clamp it closed.

I didn’t take a whole lot of pictures of this process – I figure the end product tells most of the story!
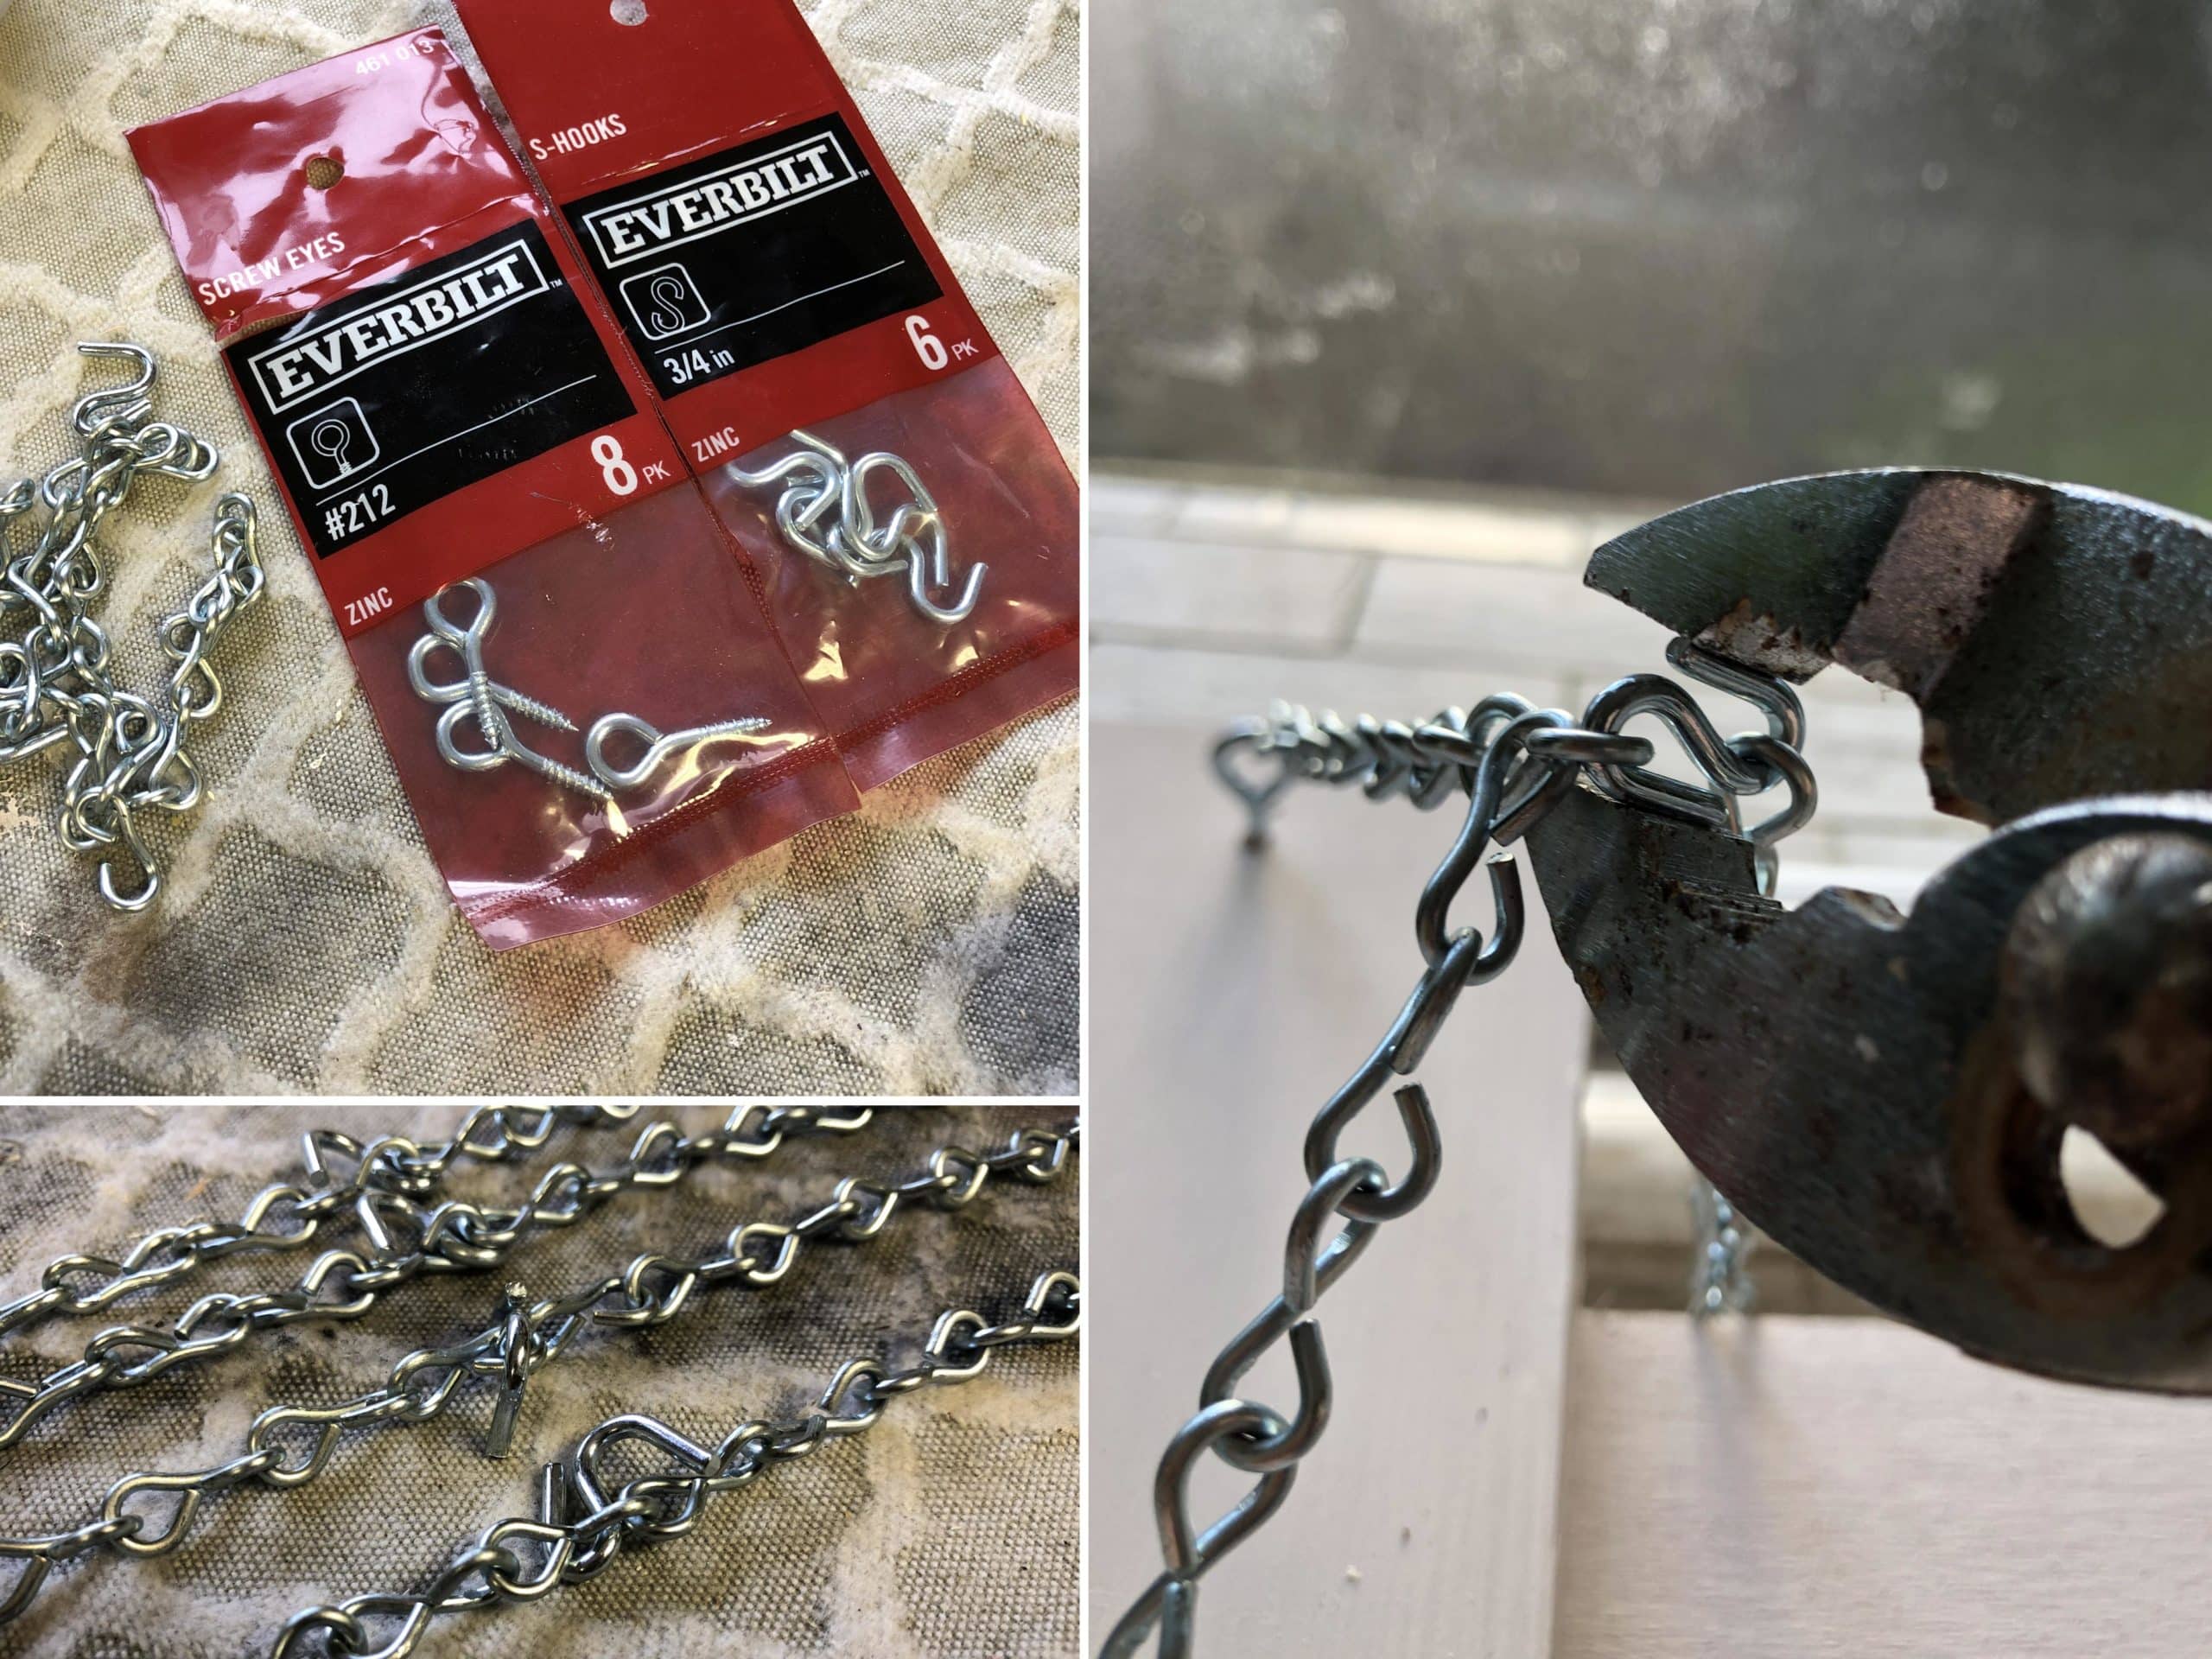
A closeup of the fasteners and chain I used. Bottom left image shows all the short chains with S hooks attached in the center. Once I figured out what length the short fixture chain needed to be, I used that as a guide to make all the others. Also, picking a chain type with an ‘openable’ link is key.
Attach Clips
I saved this part for last because the clips are easily bendable and I didn’t want to mash them while working on the chain. 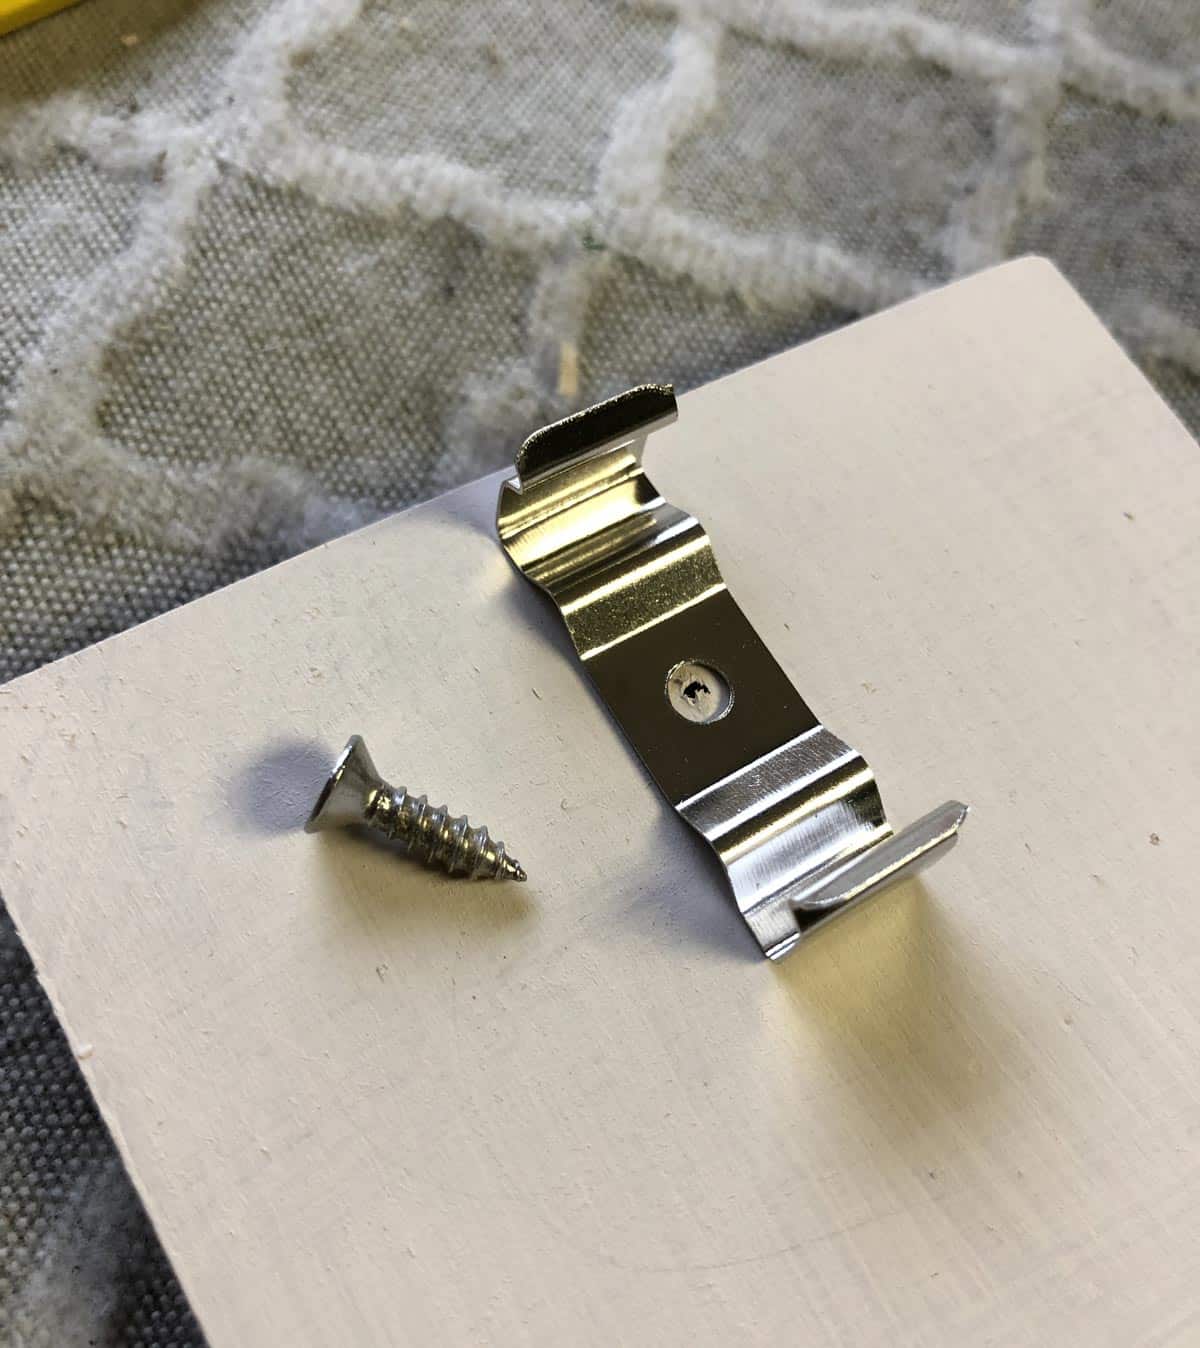
Hang Lamps and Clip in the LED Lights
Or vice versa depending on how your lights clip in!

In the left photo you can see the fixture in the back is set very close to the ceiling. That one is illuminating a tall storage bin containing some conifer cuttings. I probably will swap that out for a regular seed tray at some point, and having an adjustable chain makes doing so really easy.
Wrapping Up
So that’s the processes! I’ve had these in use for about 2 months now and they are working out great. I’m sure there are other, maybe better, ways to build these – I’ve seen some inexpensive rope and pulley systems you could use in lieu of chains. I’ve found an advantage of using chain is that I can temporarily raise the lights to water or otherwise work by hooking the chain up a second time. When I’m done, I unhook the doubled up chain and the height is right back where it was before. As always, I find I never take enough pictures, so if anything is unclear I’m happy to answer questions! Or if you’ve build your own light setup, I’d love to hear how you did it! 
Those light fixtures are available on Amazon. I remember people installing them to offset bad lighting in basements and garages.
Thanks for the tip!